
Using the Mailform Invoice page
Here We'll walk you through how we present your clients and invoice information within Mailform
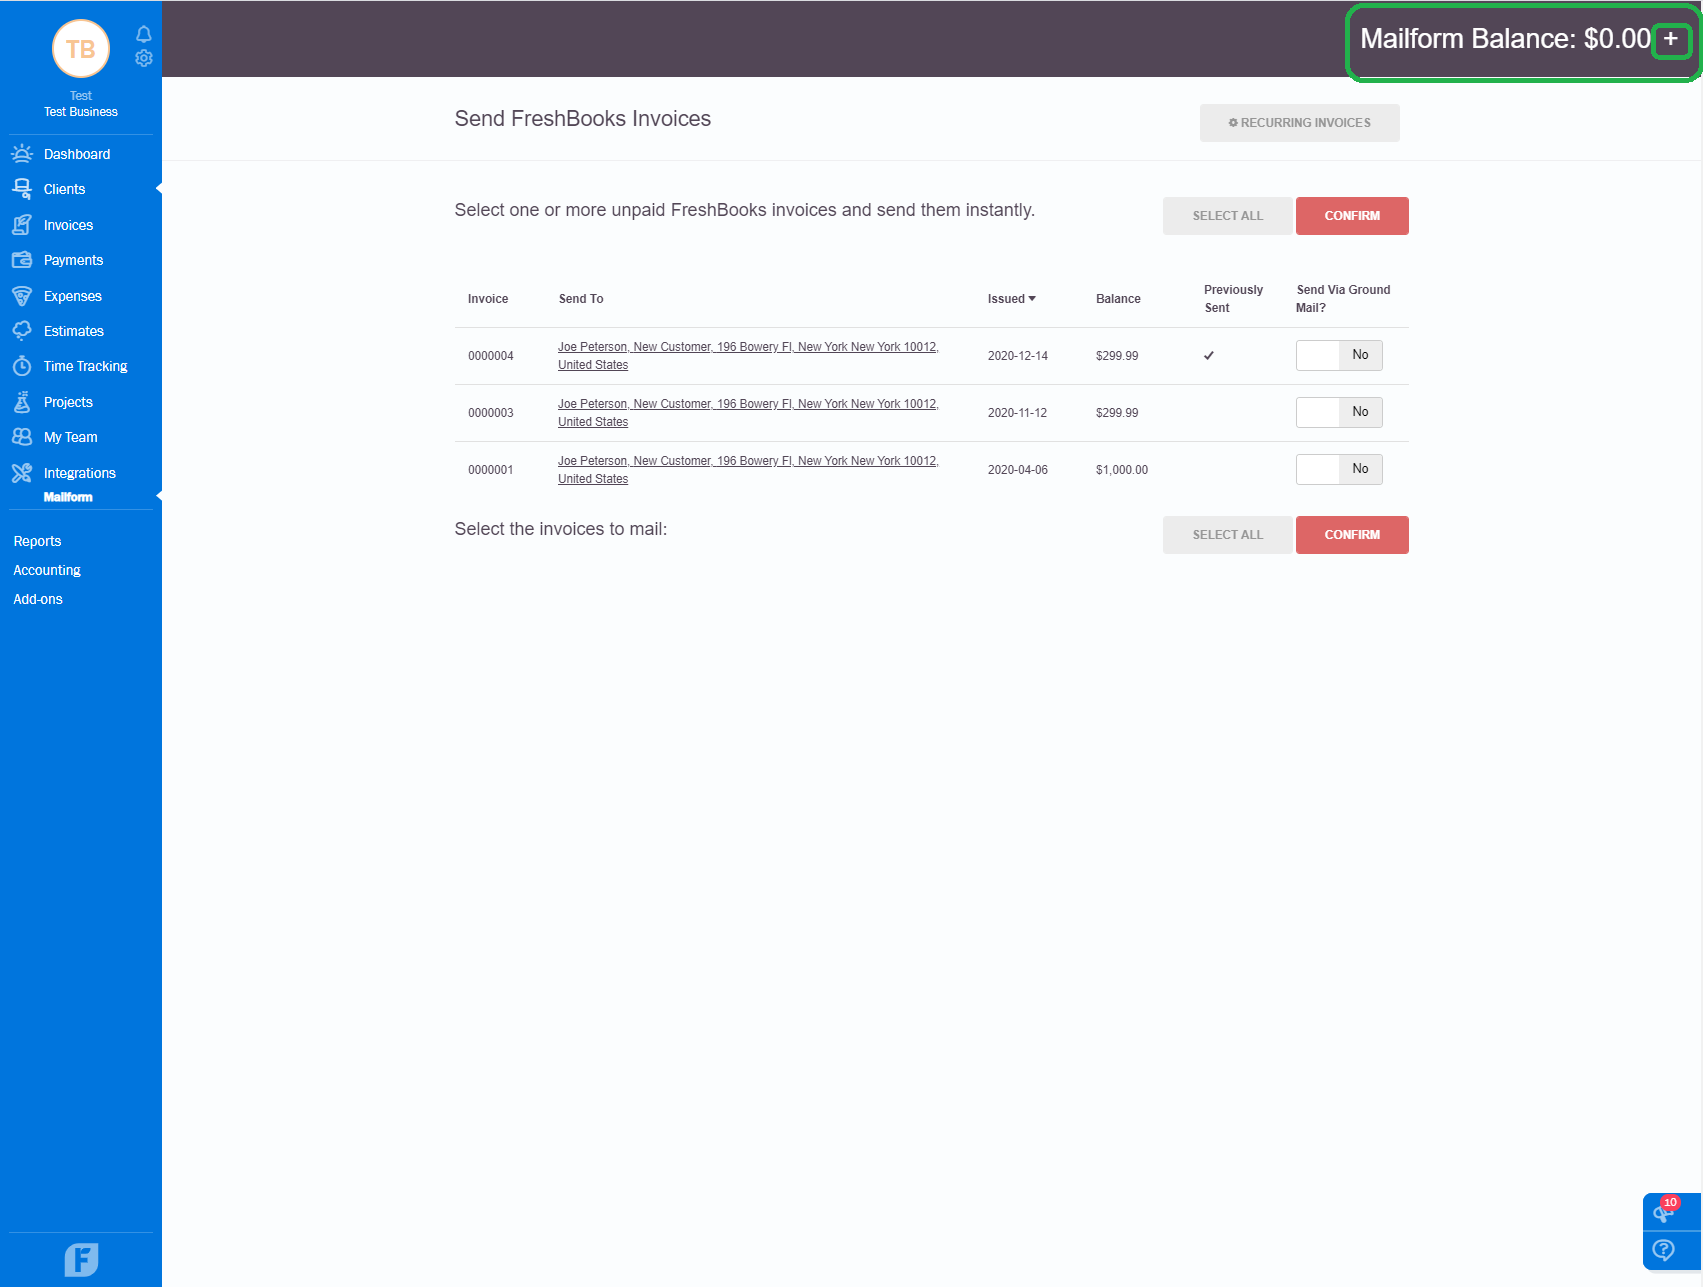
Mailform Balance
You can purchase credit in advance to manage recurring invoices or for convenience. Your balance will be available in the top right of the screen and you can click on the "+" button to add more credit to your company account
Manage how your recurring invoice profiles are sent via Mailform - click here for more detailed instruction
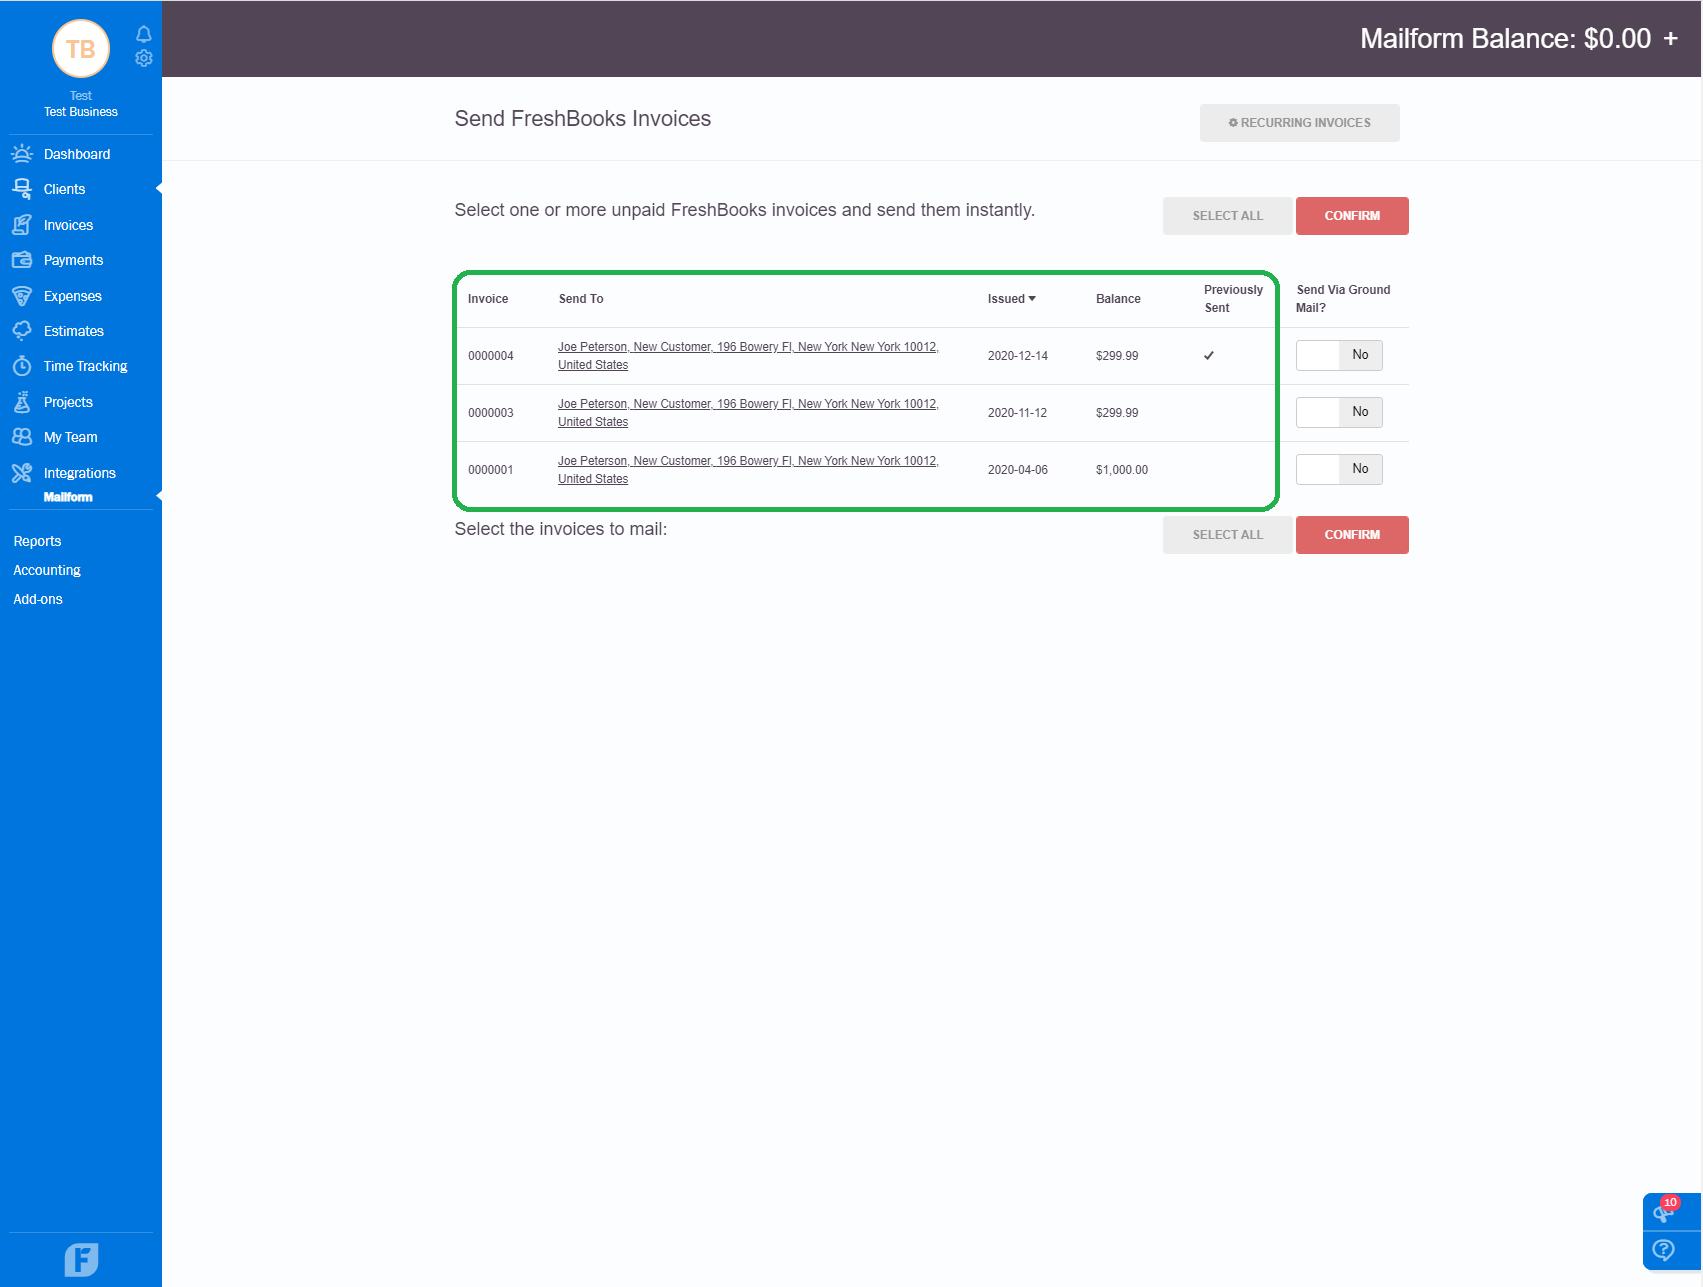
Invoice Summary Data
We'll automatically pull information from your invoices and present some summary information:
Invoice - Invoice number associated with this invoice
Send To - This is the address which the invoice will be sent to if you elect do do so via snail mail. This address will align with whatever is saved on the specific invoice and will not necessarily change if you change the customers address within Freshbooks. You can click on the address and make last minute changes for mailing purposes within the integration
Issued - The date the invoice was created within Freshbooks
Balance - The balance owed by the customer and reflected on the invoice
Previously Sent - If this column is checked, this means that you have either sent this invoice via email or via Mailform.
o send mail via USPS First Class or Certified service, you can click Select All to mark all invoices or click each switch as you see fit. The switches should move to the "Yes" position before you hit "Confirm". Please keep in mind you will be able to review and select services after you click Confirm 
Once you have selected the appropriate invoices, we'll prepare your PDFs and load them into our Bulk Mail tool. Each invoice will default to send a double sided invoice via a #10 windowed envelope with a separate perforated insert and return envelope pre selected (postage is not paid on your return envelope). You may add features like CertifiedMail, color or a flat envelope at this stage. Use the radio buttons at the top of the columns to make a selection for all envelopes and once you're happy, click Mail All to choose a form of payment. You can also preview each Invoice to see the entire contents of your mailing by clicking on the text in the "Files" column:

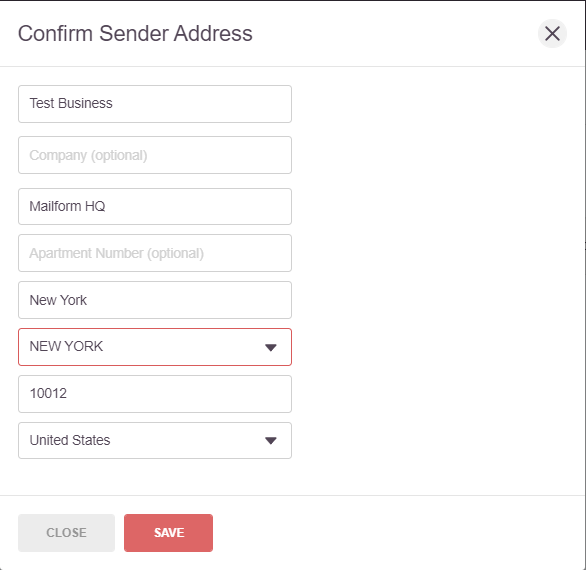
After clicking Mail All, we will automatically pull in your address within Freshbooks, which you can amend if required. This is the address that will be printed on each return slip
Then chose to pay via Credit Card, your Mailform Credit Balance or Paypal
Should an automatic invoice mailing fail, there will be a comment attached to the invoice that looks like this:
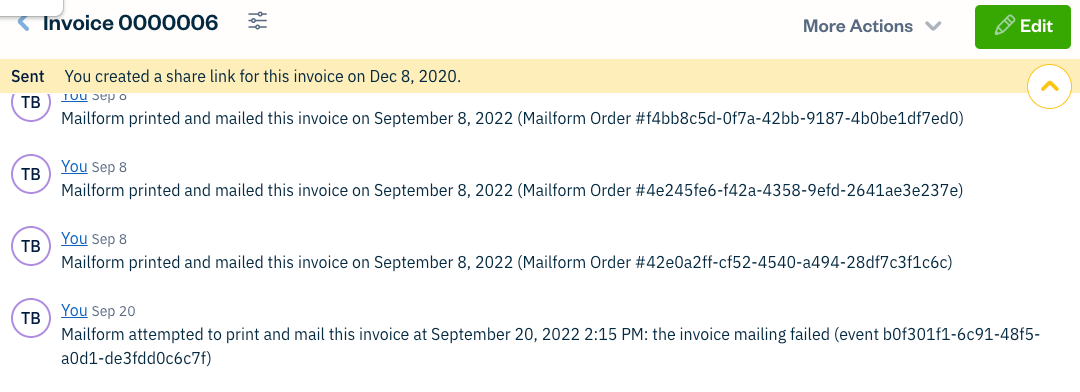
If this happens you can retry sending the invoice manually.
If you're still not sure if your order went through - please just reach out to us!