How to configure Mailform Single-Sign On using Microsoft Entra ID
Please note that SAML SSO is only available on the Small Business plan. Visit https://www.mailform.io/pricing/ to learn more.
Mailform is the easiest way to print and mail a letter, online or offline. If you're sending mail with a team, Single Sign On (SSO) can simplify managing team members, and improve security. For teams that use Microsoft Office 365 or Azure, you can configure Microsoft's Entra ID to let your users log into Mailform with their existing Microsoft account credentials using Security Assertion Markup Language (SAML) SSO. Your users will be automatically logged into their Mailform account without requiring a new username and password, and you can centrally control who has access using the Microsoft Entra administrative tools.
The steps below assume familiarity with Microsoft Entra ID's administrative options: note that the interface may have changed since this guide was prepared. Please reach out to us at support@mailform.io with any questions you may have.
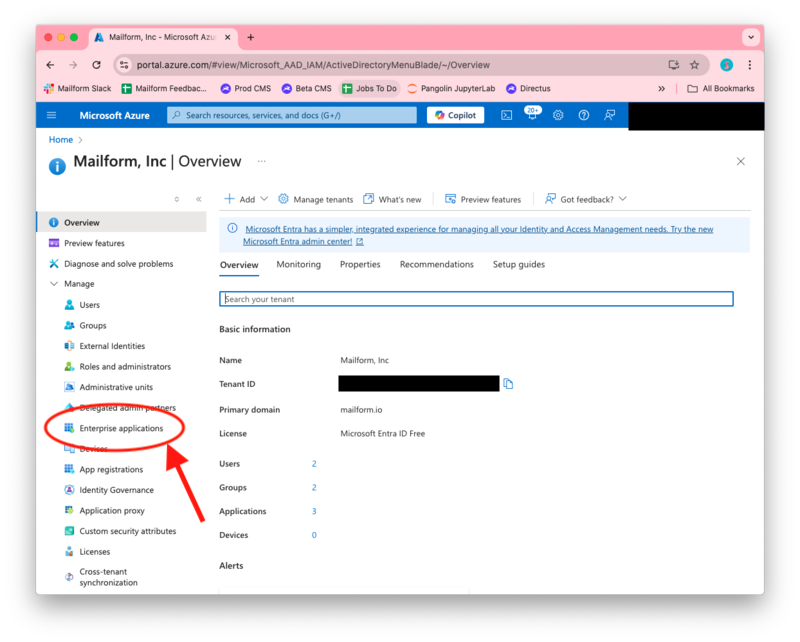
1. Visit https://portal.azure.com/#view/Microsoft_AAD_IAM/ActiveDirectoryMenuBlade/~/Overview to open the Entra admin portal. Once it opens, click on the Enterprise Applications link on the left.
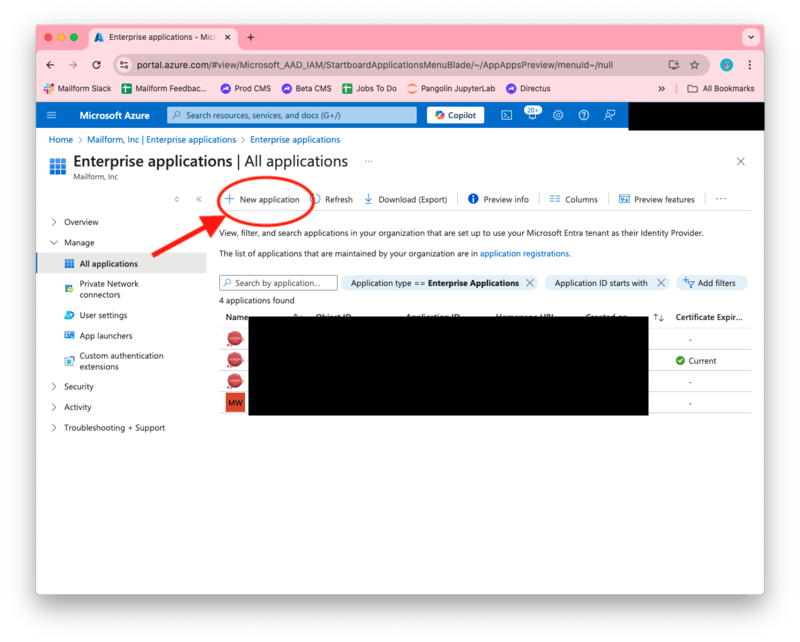
You'll be shown a list of existing applications. Click the New application button to continue.
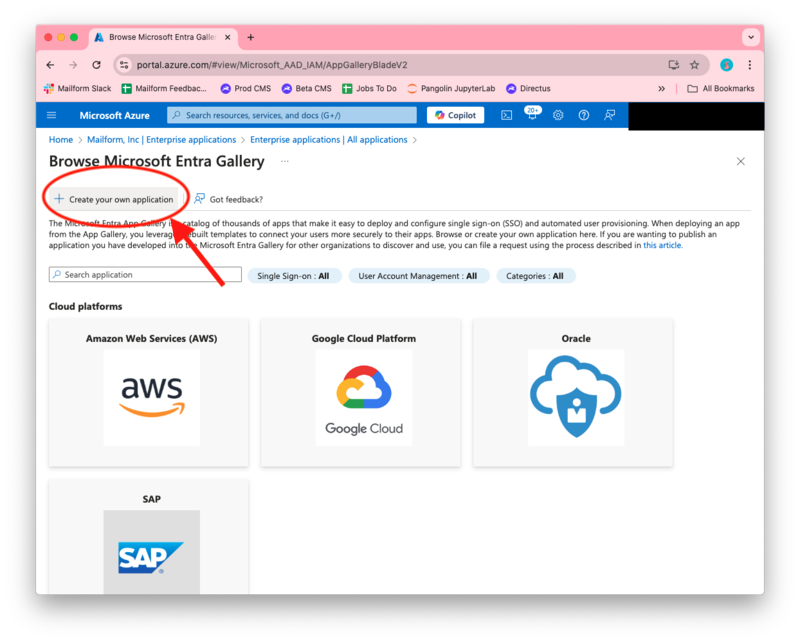
A set of applications will be shown. Click Create your own application to continue.
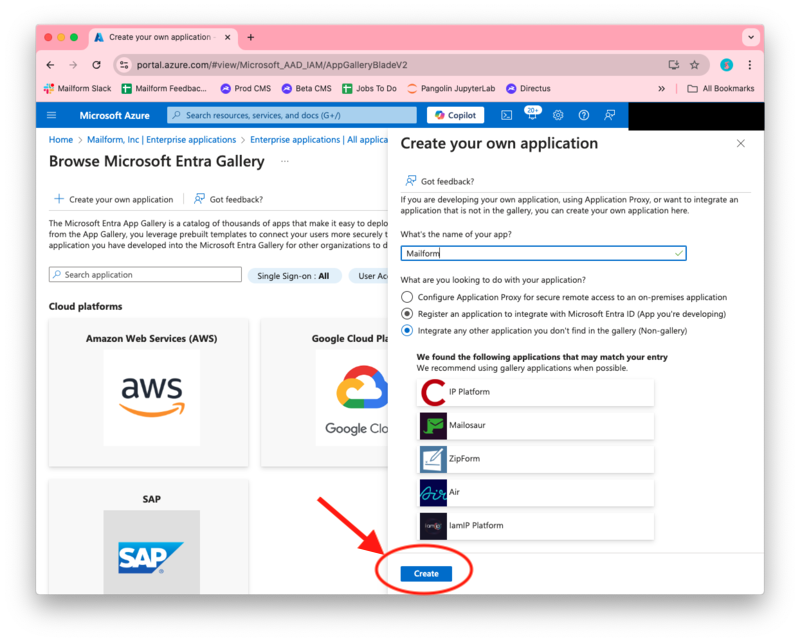
The application information form will appear. Enter the application name (Mailform in this case) and select the option Integrate any other application you don't find in the gallery option. Click the Create button to continue.
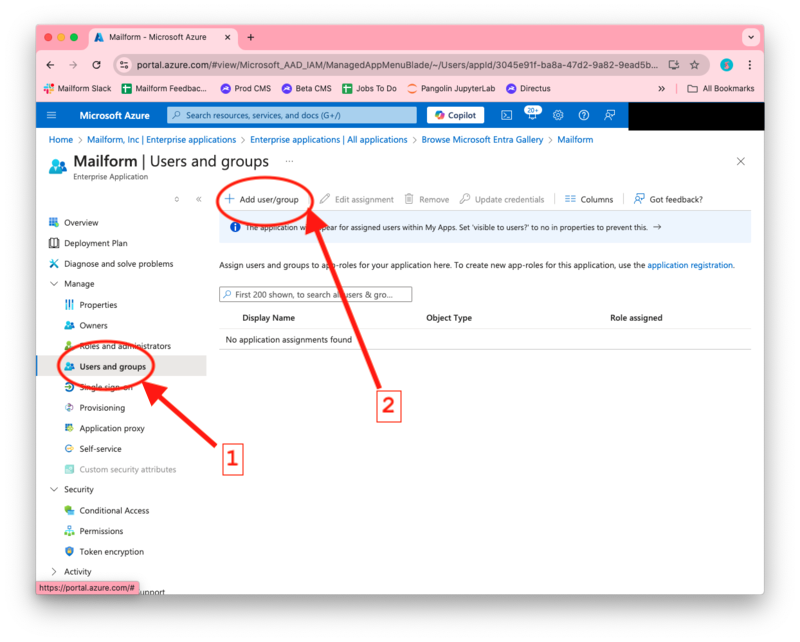
Wait for the application creation process to complete: once it is ready, click the Users and groups option on the left (1), then click the Add user/group option in the top (2).
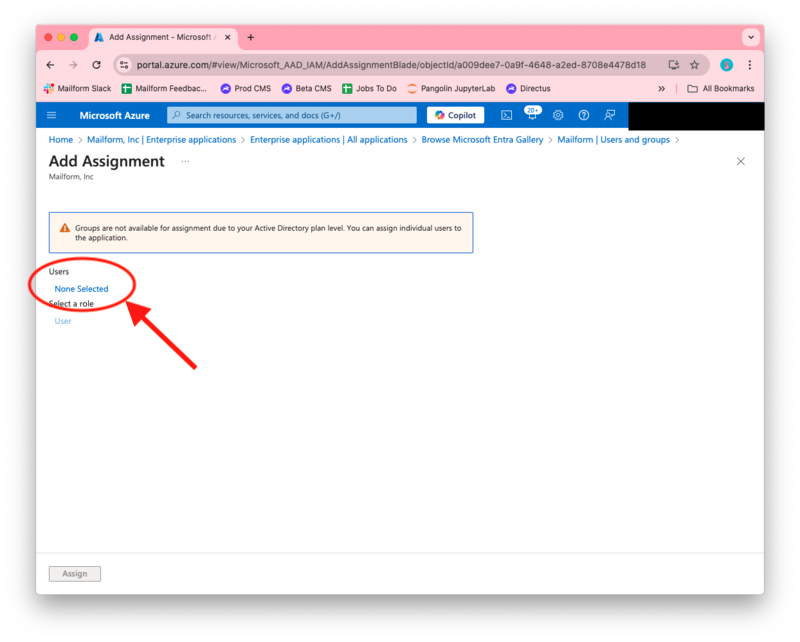
In the selection window, click the None Selected option to open the user selection dialog.
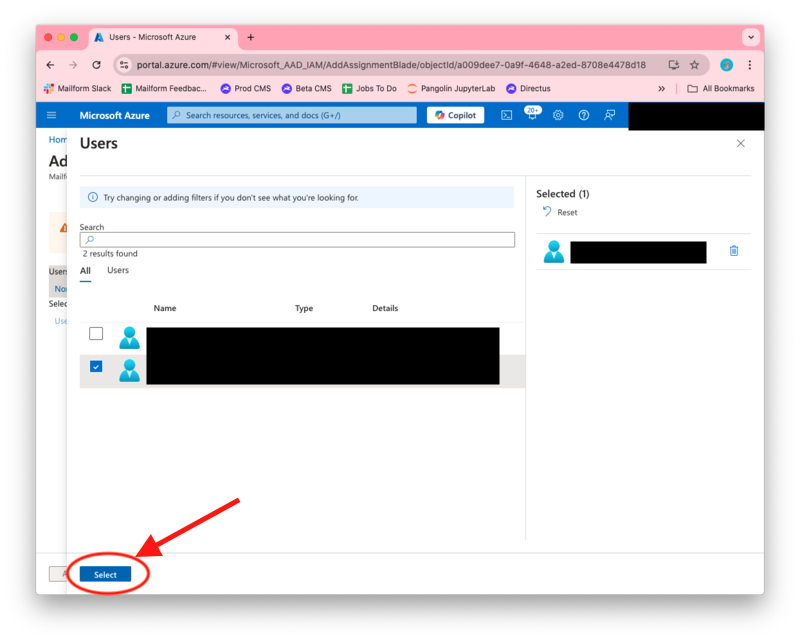
Select the user(s) that should have access to Mailform, then click the Select button to return to the assignment screen.
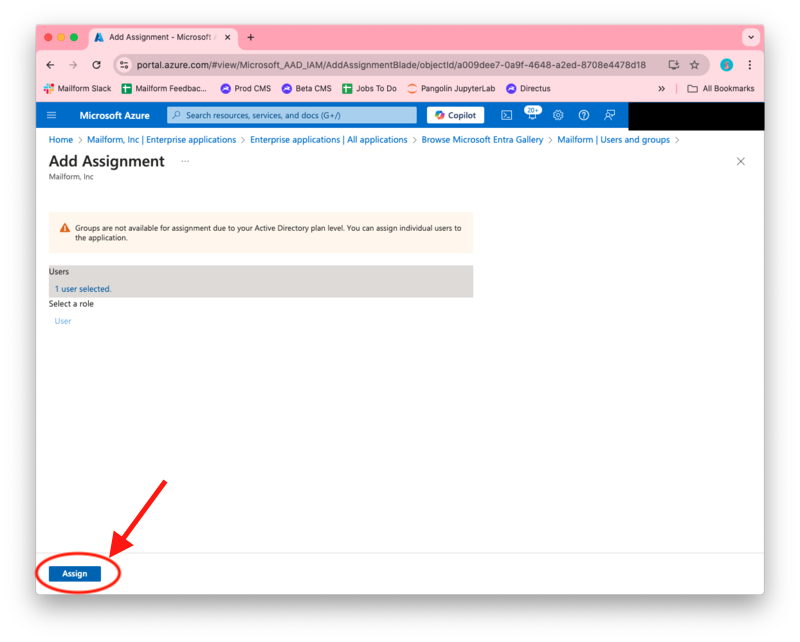
Click Assign to complete assigning the selected user(s) to the application.
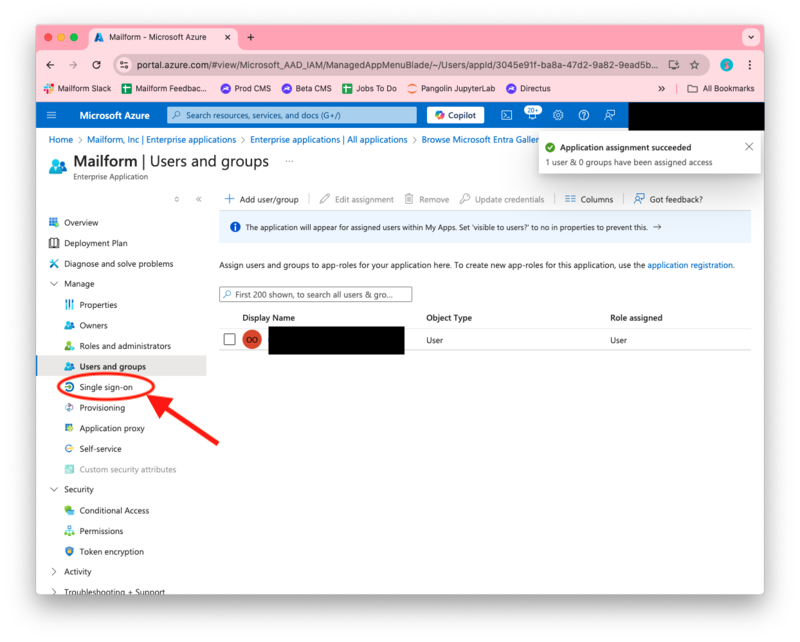
You'll see the list of user(s) with access to the application. Click the Single Sign On option on the left to continue.
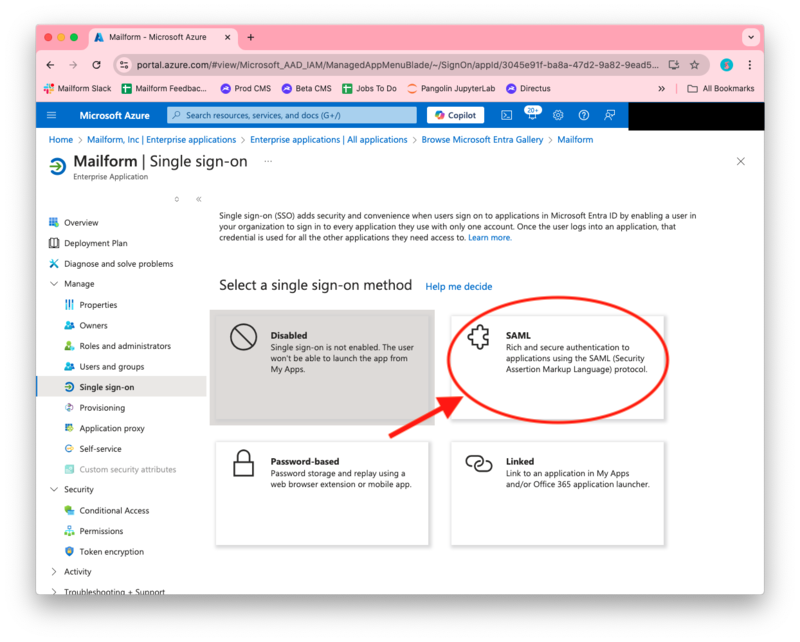
Select the SAML option and then click on it.
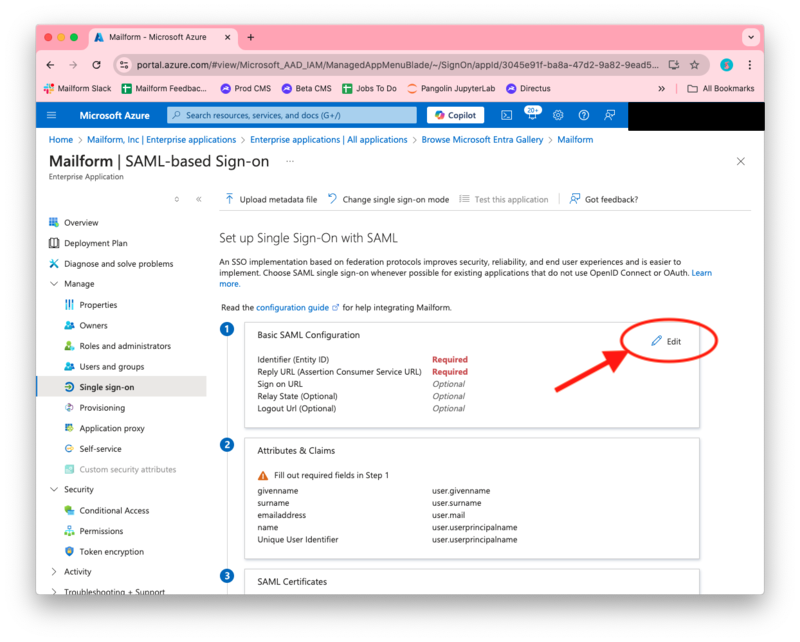
On the SAML configuration page, click the Edit button in the Basic Configuration section.
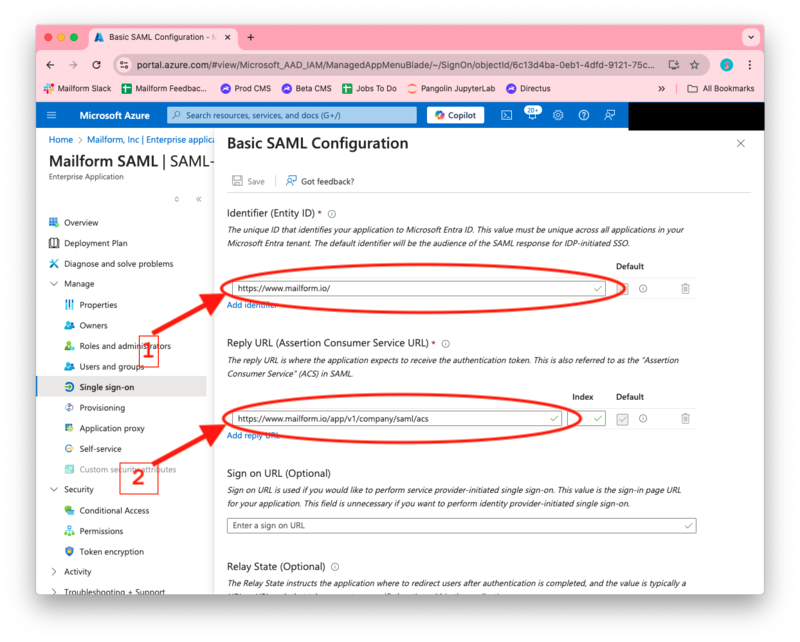
Update the configuration to set the Identifier to https://www.mailform.io (1) and the Reply URL to https://www.mailform.io/app/v1/company/saml/acs (2). Click the Save button to save your changes (3).
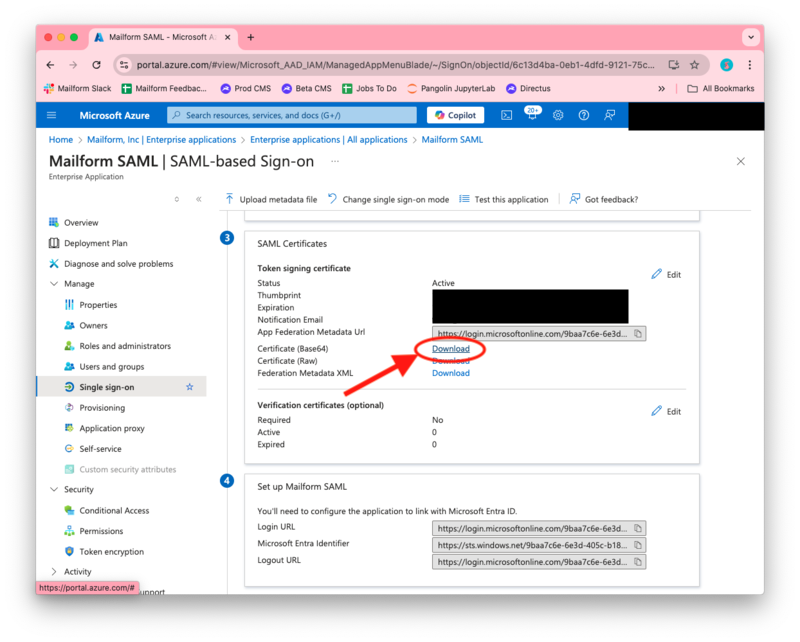
Download the SAML certification (the base 64 formatted option): you'll need this to configure Mailform's SAML SSO. Scroll up to the Attributes & Claims section then click Edit.
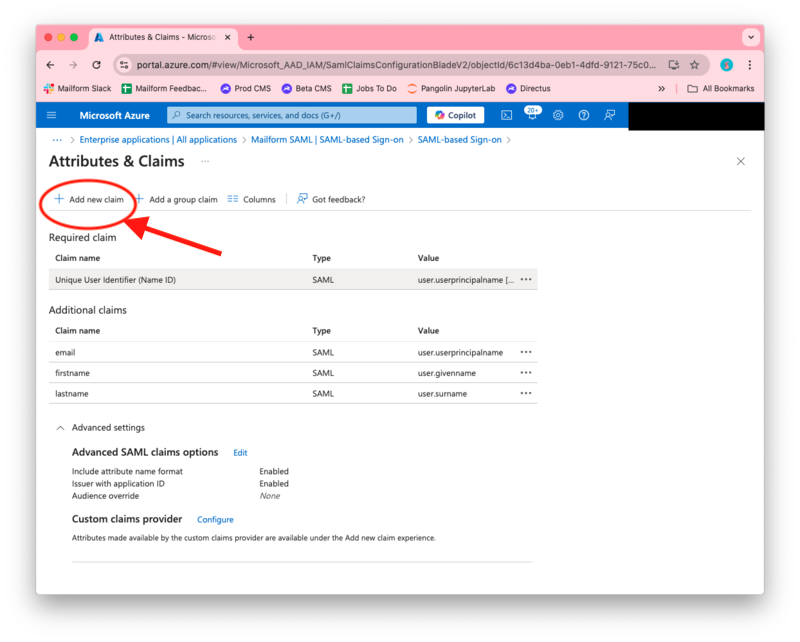
In the Attributes & Claims screen, click the Add new claim button.
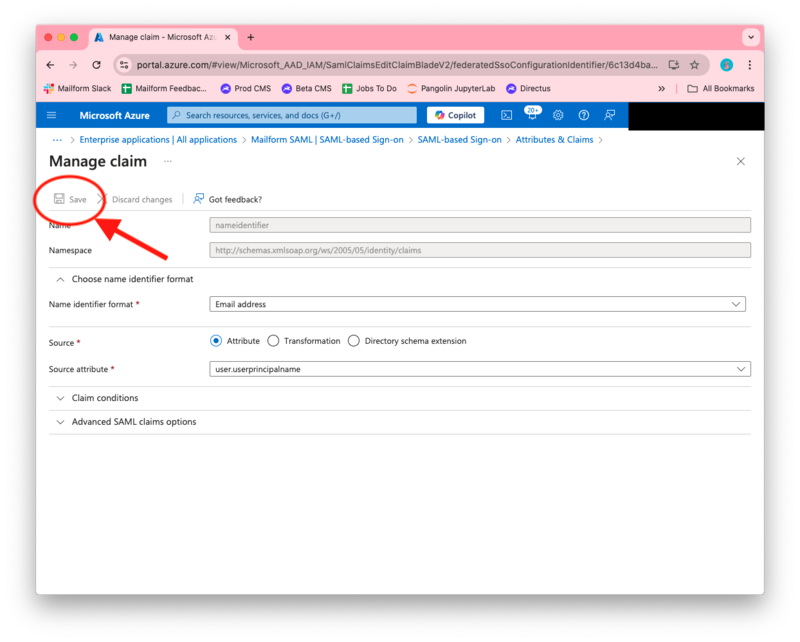
For the required claim, set the Name identifier format to Email address and set the Source attribute to user.userprincipalname. Click Save once complete.
Add the 3 additional claims required:
Claim name email, source attribute user.userprincipalname.
Claim name firstname, source attribute user.givenname.
Claim name lastname, source attribute user.surname.
Close the claims screen: Microsoft Entra ID is now fully configured.
Contact us at support@mailform.io to complete the configuration in your Mailform account.

