How to Customize Return Addresses in Mailform
Mailform offers a simple but powerful feature that allows you to include a custom return address on your outgoing mail. Whether you're guiding a single client to return mail to a court or regulatory body or managing a massive claims process which require documents to be return to unique addresses across many clients, you can easily specify where return envelopes should be directed on a per recipient basis.
This guide will walk you through the process.
Single Letter Instructions
Start at Mailform and upload your document using the quick start option
Enter your recipient's address
Enter your own (return) address
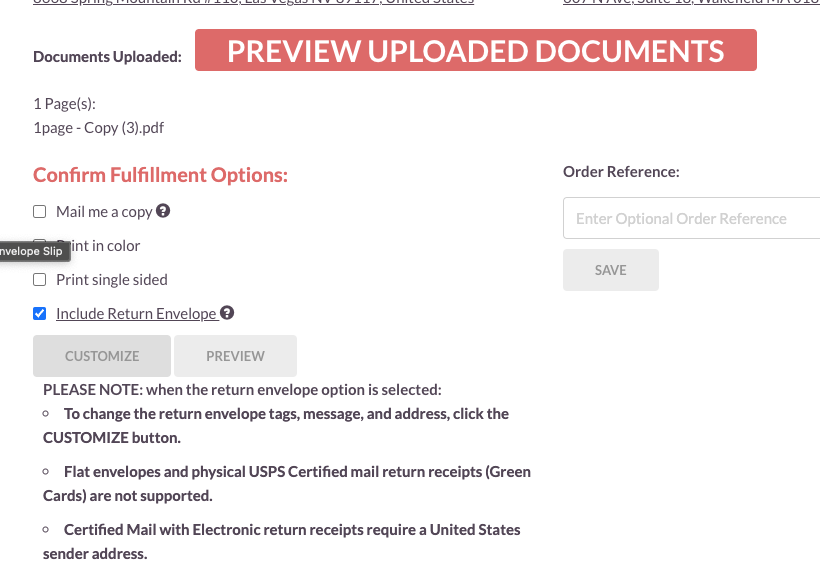
Here's where you'll use the new feature - on the confirmation page, look for the additional options section
Select "Include Return Envelope" from the fulfillment options
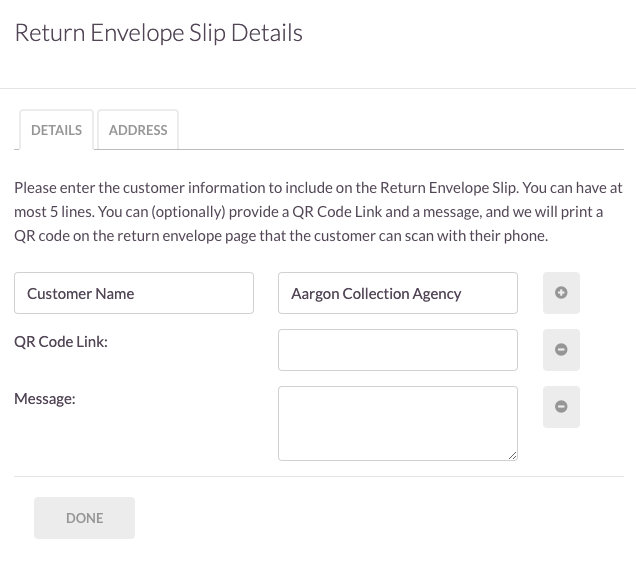
Click the "CUSTOMIZE" button to modify the return envelope details
Customizing the Return Envelope
You have two main options for customizing your return envelope:
Option 1: Add Enhanced Details
You can enrich the return envelope with a customer id, QR code (scannable by phone), add a custom message or up to 5 lines of additional information.
Option 2: Override Return Address
To use a different return address:
Check "Use Custom Return Address"
Add a new address (the default is the sender address)
Save changes by pressing "Done"
Bulk Mail Instructions for Unique Return Addresses
When sending multiple letters, you have two efficient ways to manage sending mail on behalf of many return addresses:
Method 1: Individual Customization
Within the BulkMail tool, you can customize return addresses for each envelope:
Select the envelope(s) you want to customize
Look for the custom return address option in the hamburger dropdown menu to the right of each row
Enter the desired return address details
Method 2: Bulk Import
For large mailings, save time by preparing each row or envelope in your file by completing our template with additional custom addresses. In this case you can include columns in your .csv or .xlsx file which include the custom return address for each row ( or envelope). The system will automatically pick up the addresses as long as they are in this format.
Important Notes
- Certified Mail with Electronic return receipts requires a United States sender address
- All custom return addresses must comply with postal regulations
---
Need more help? Contact support@mailform.io


