
Sending mail from Microsoft Power Automate
Mailform is the easiest way to print and mail documents, letters and invoices from your computer or mobile device: you can send USPS Priority, Express, Certified & First Class Mail without ever going to a post office.
The Mailform connector allows flows in the Power Automate environment to send physical mail: provide a PDF proof and some print specs such as color/black and white printing or simplex/duplex printing, and Mailform will print the document to spec, stuff it in an appropriate envelope, add postage and hand it off to the USPS (and soon, FedEx) on your behalf. The connector provides a single, straightforward method to do this: you could for example have a flow that reacts to a new user signup by sending them marketing documents, or sending a customer a postcard with a coupon 30 days after their order is shipped.
Prerequisites
You will need the following to proceed:
A Mailform account with a valid, non-zero credit account (to pay for your print and mail jobs). Sign up for free at Mailform.
Getting Started
You will need an API key to configure the connector. Here’s how you can get one:
Log into your Mailform account at Mailform
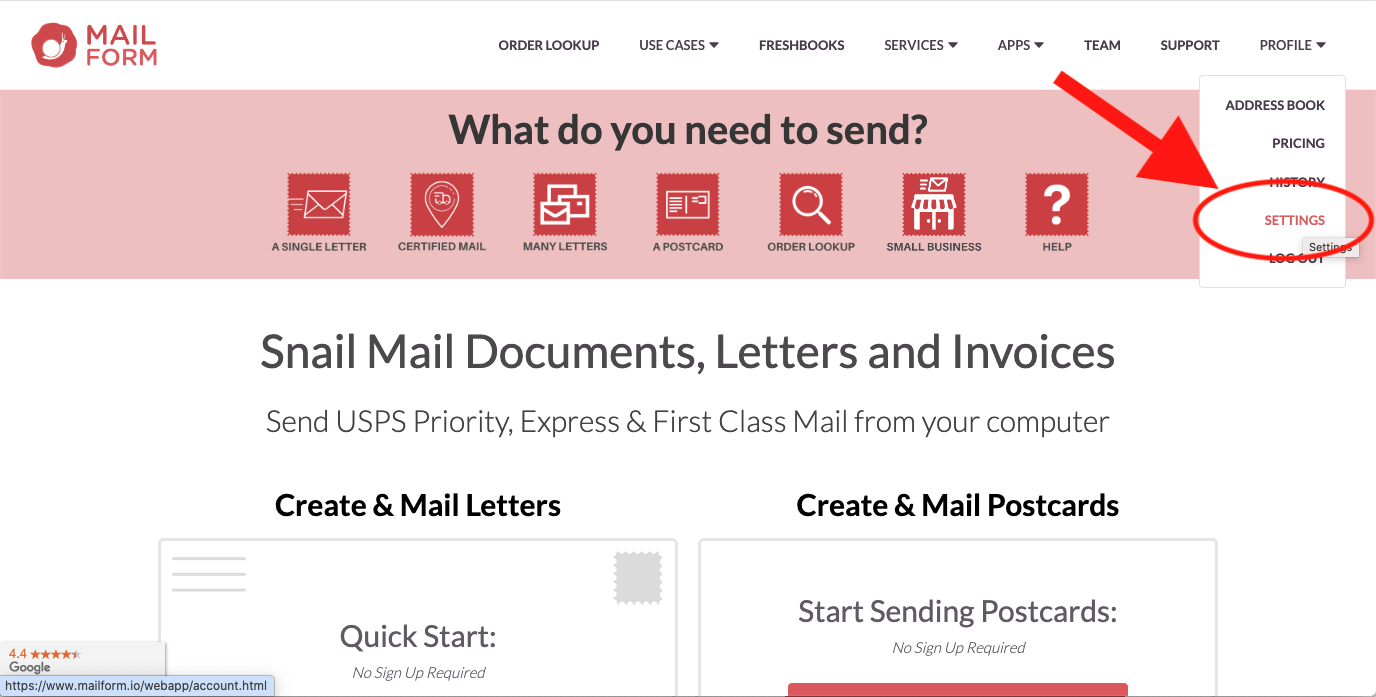
Go to your Billing settings by visiting Mailform Billing. First click on the Profile menu and then click on Settings
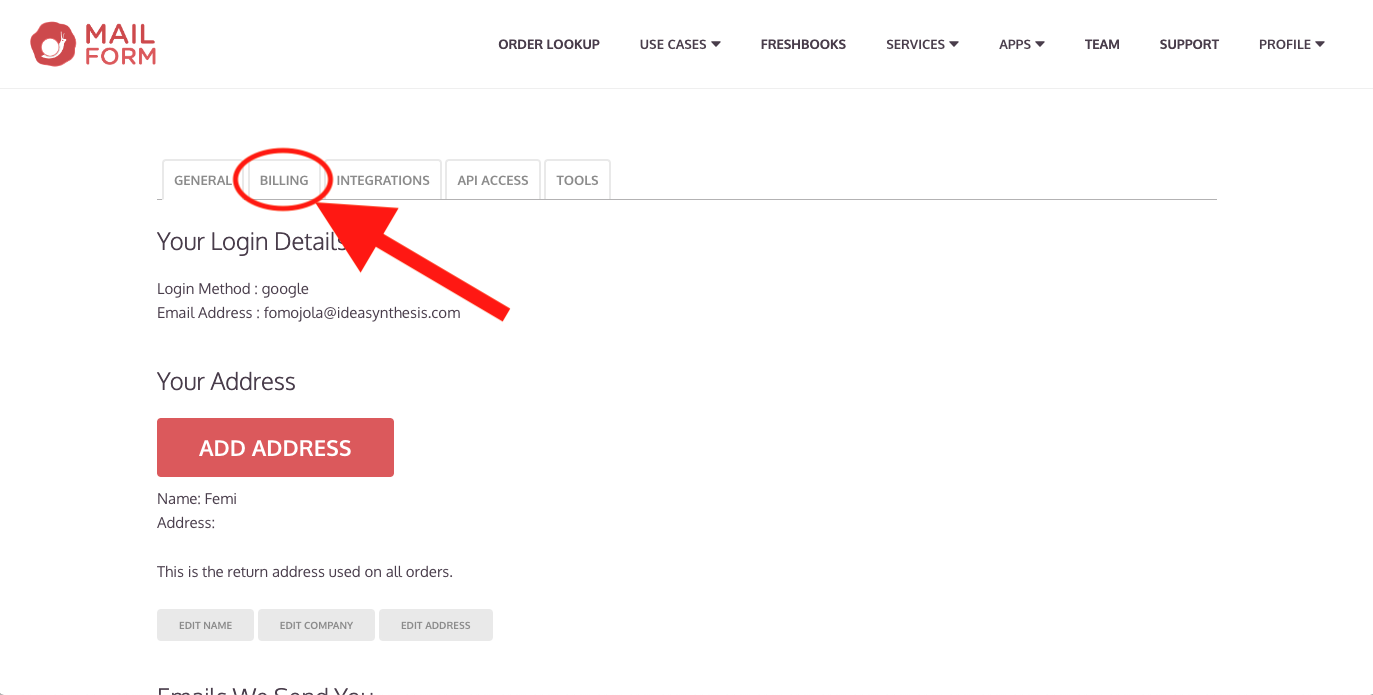
Once the Settings page opens up then click on Billing
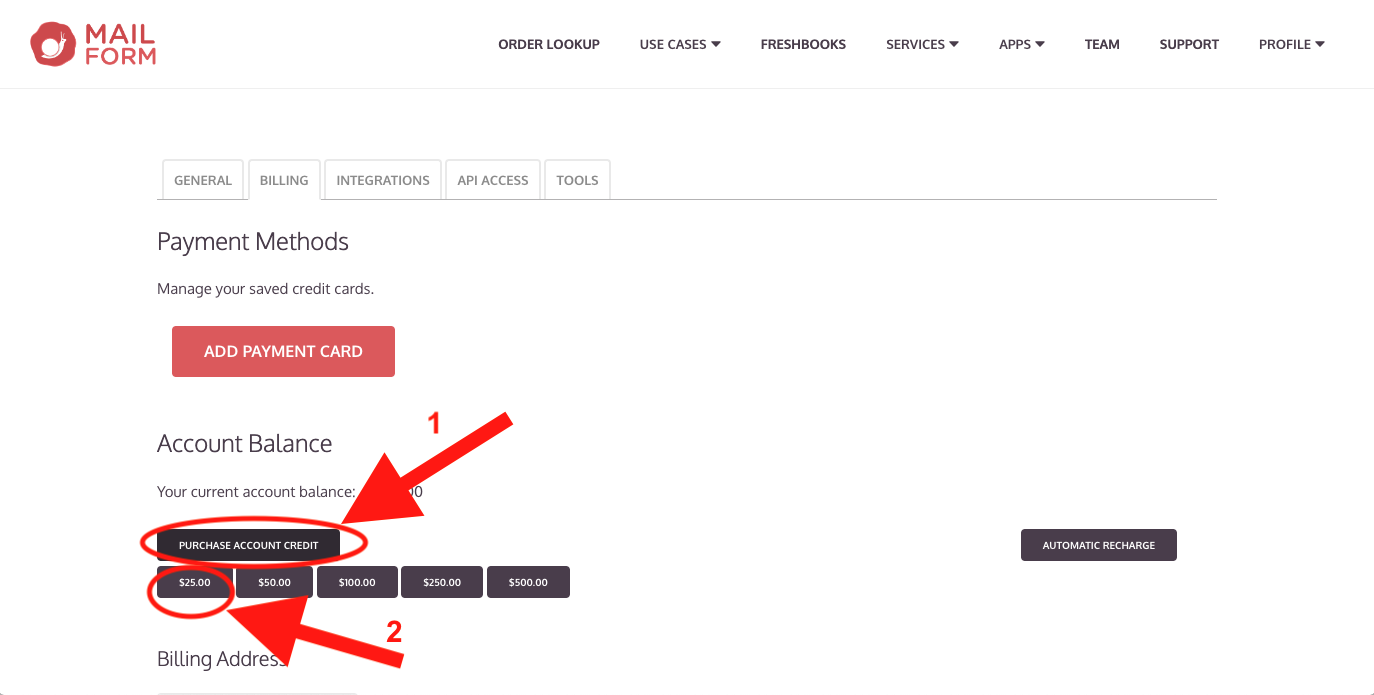
On the Billing tab, click the Purchase Account Credit button, and then click the $25.00 option to add the minimum amount of credit to your account.
Complete the payment process: this will create a credit account and add credit to your account.
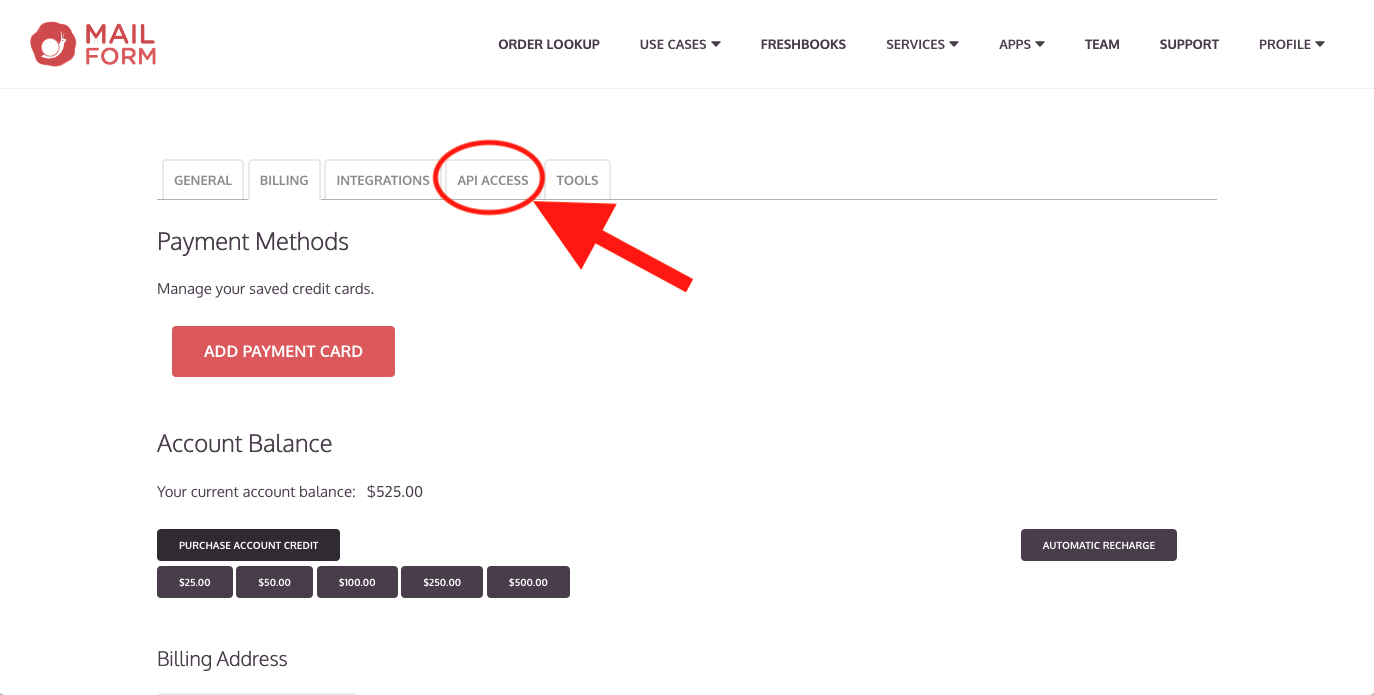
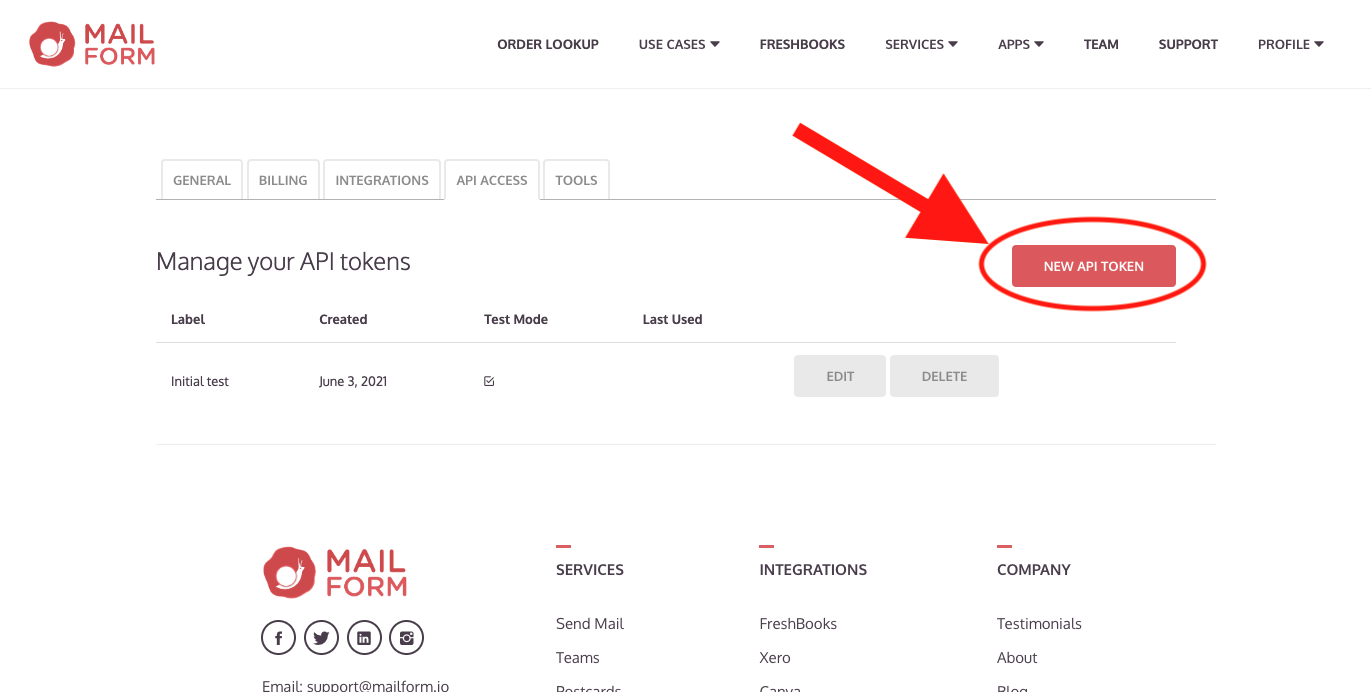
Go to the API Access settings by clicking on the API ACCESS tab or visiting Mailform API Access
Click the NEW API TOKEN button,
then give the token a label (such as Power Automate Testing).
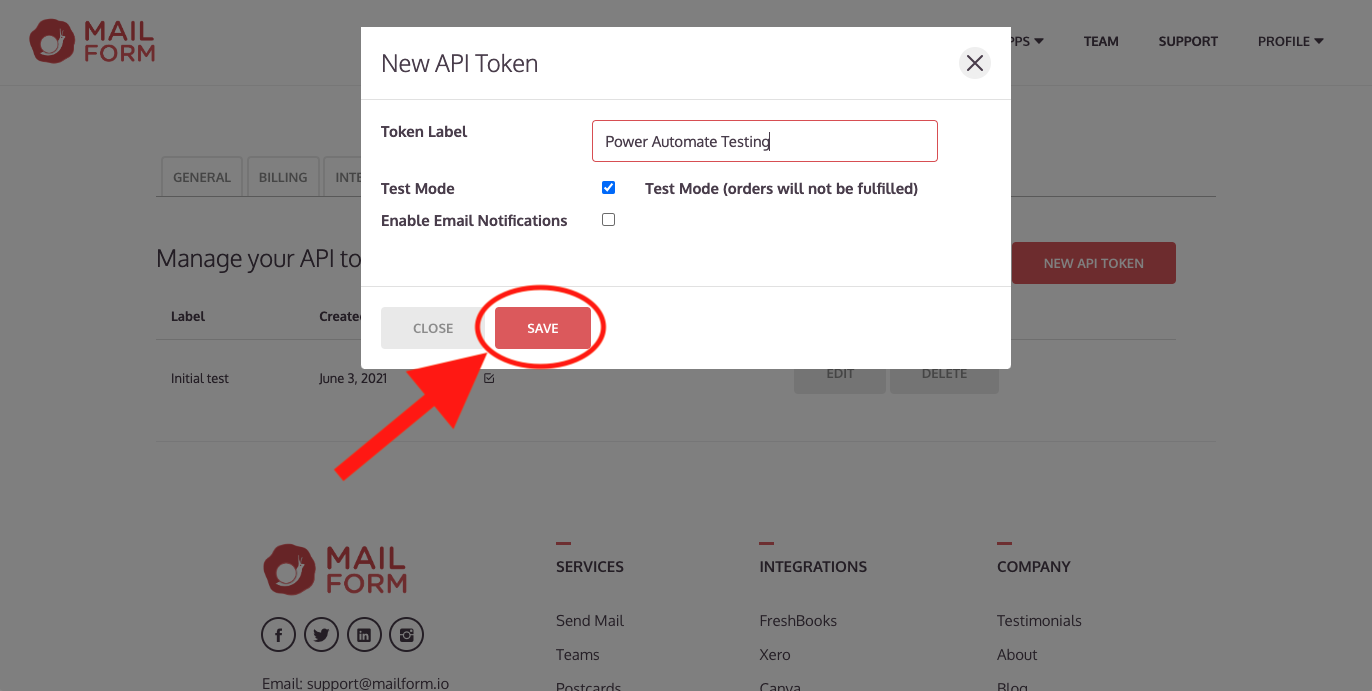
Click Save. While testing, you can enable test mode for this key: all API requests will be accepted and verified, but no actual mail will be sent. Test mode orders will be accepted and then immediately cancelled, and will not affect your credit balance.
The new API token will be shown:
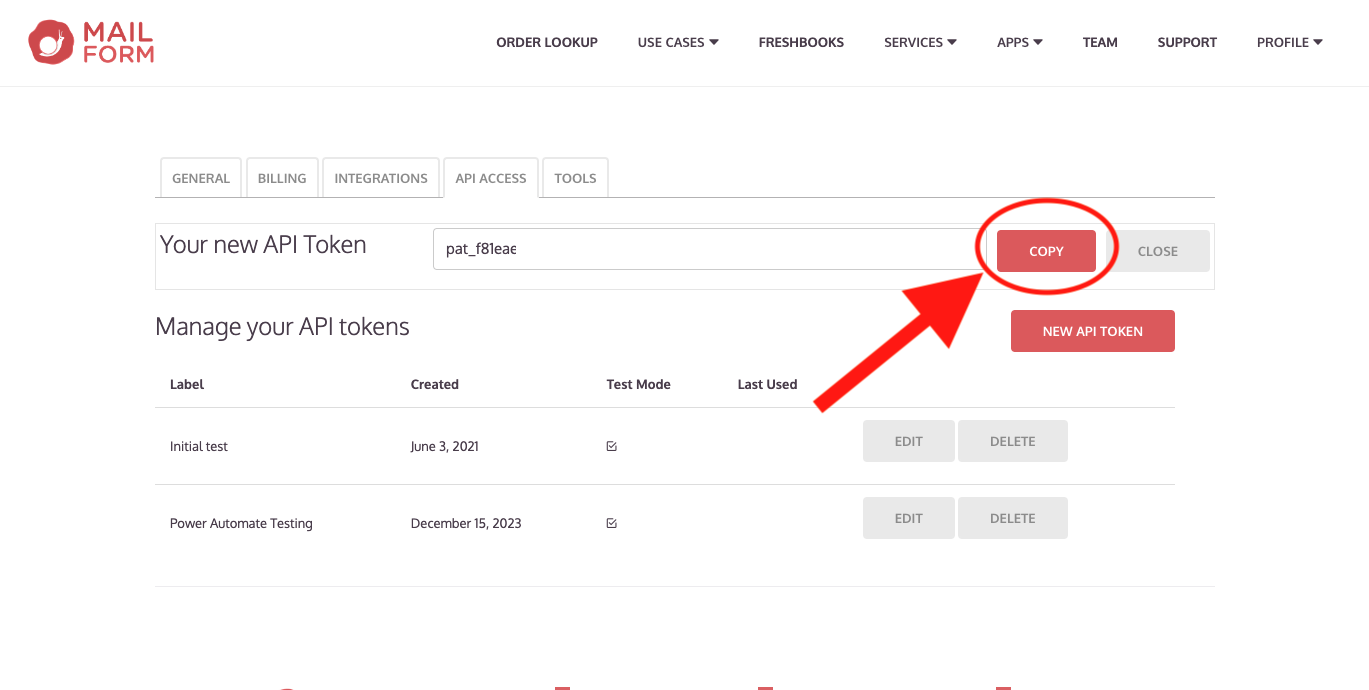
click Copy to copy it to the clipboard, then save it, as it will NOT be displayed ever again. Note that test mode API tokens can never be switched out of test mode: when you are ready to go live you will need to create a new API token.
Creating a Flow
To demonstrate the use of Mailform, we will create a flow that will send a flyer with a coupon code on my birthday. In the Power Automate editor:
Create a new flow by clicking the Create button.
Select the Scheduled Cloud Flow option.
Name the flow, and set the date and frequency (in this case, every 12 months on Dec 27th, 2023).
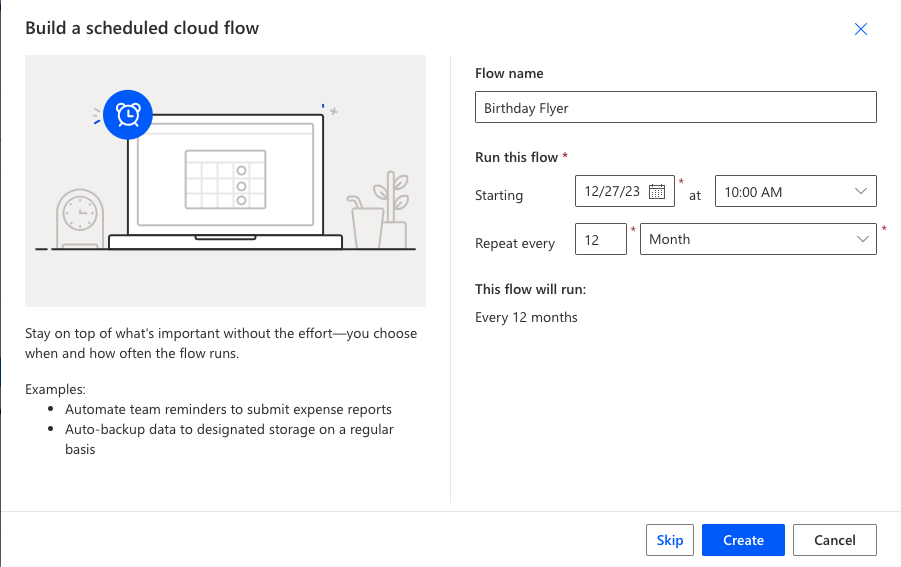
Click the Create button.
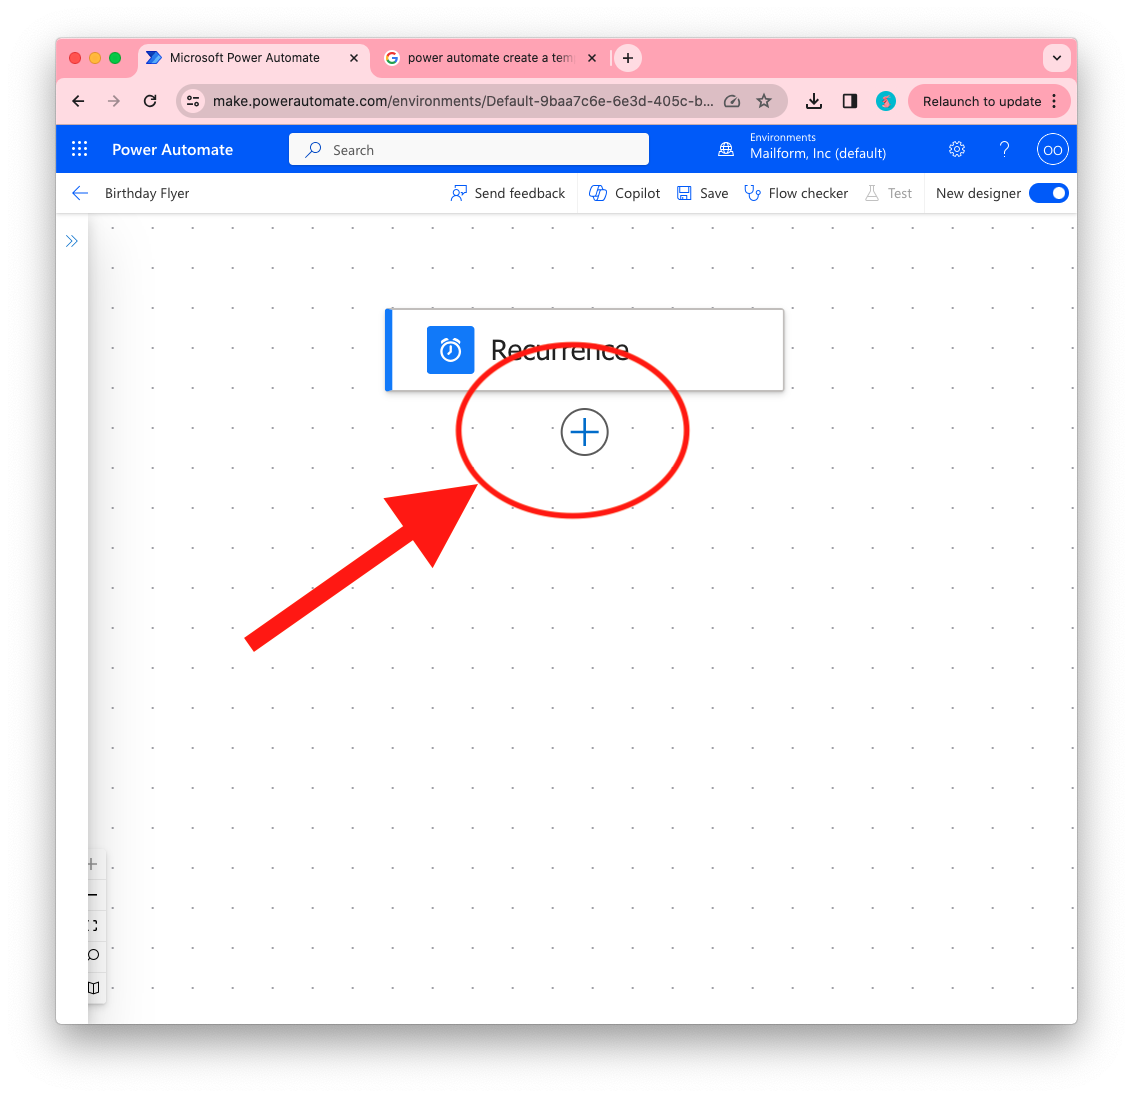
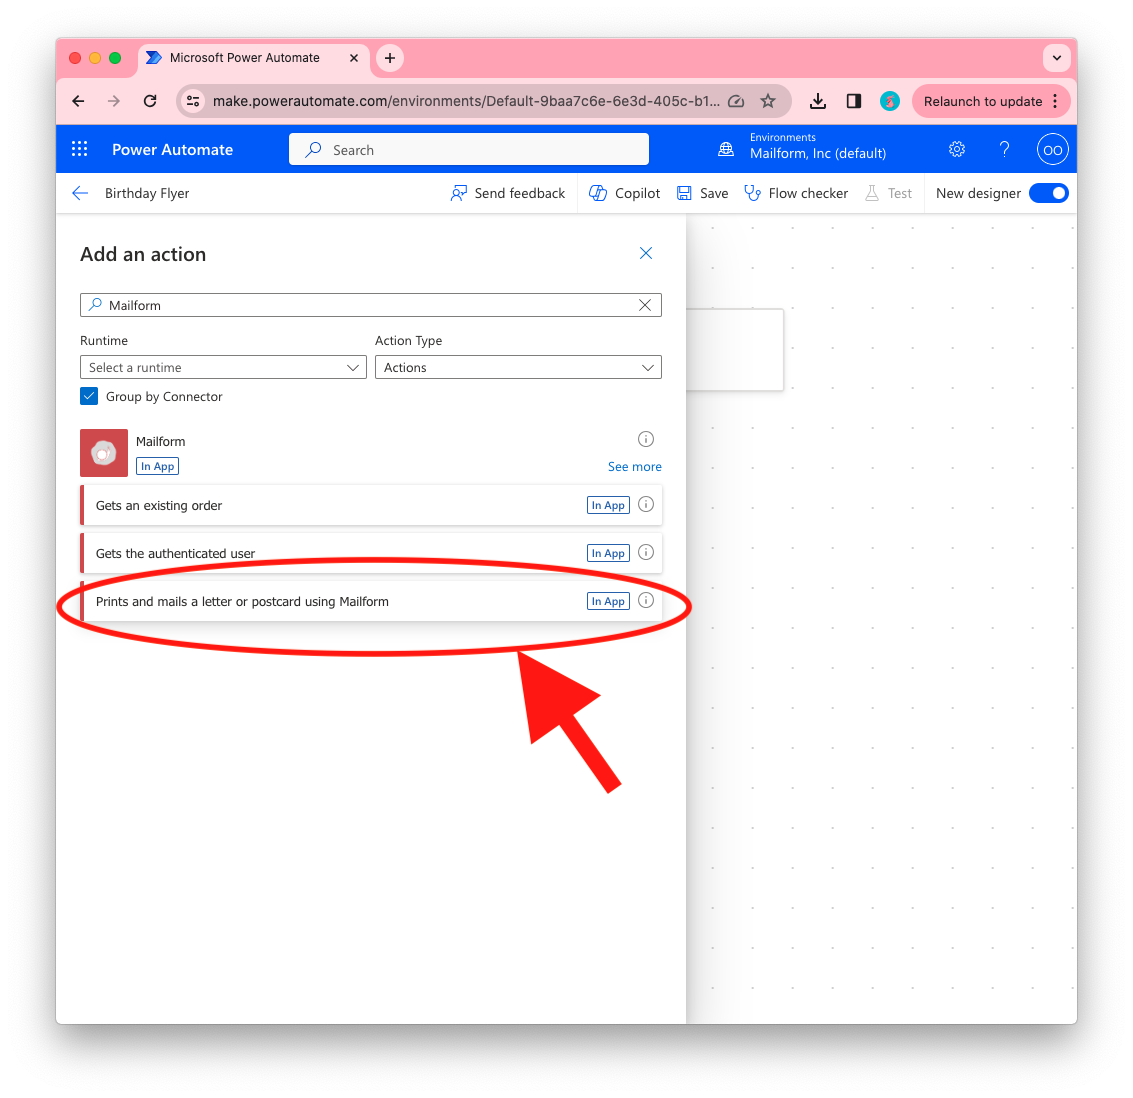
Click the plus icon and click on Add an action.
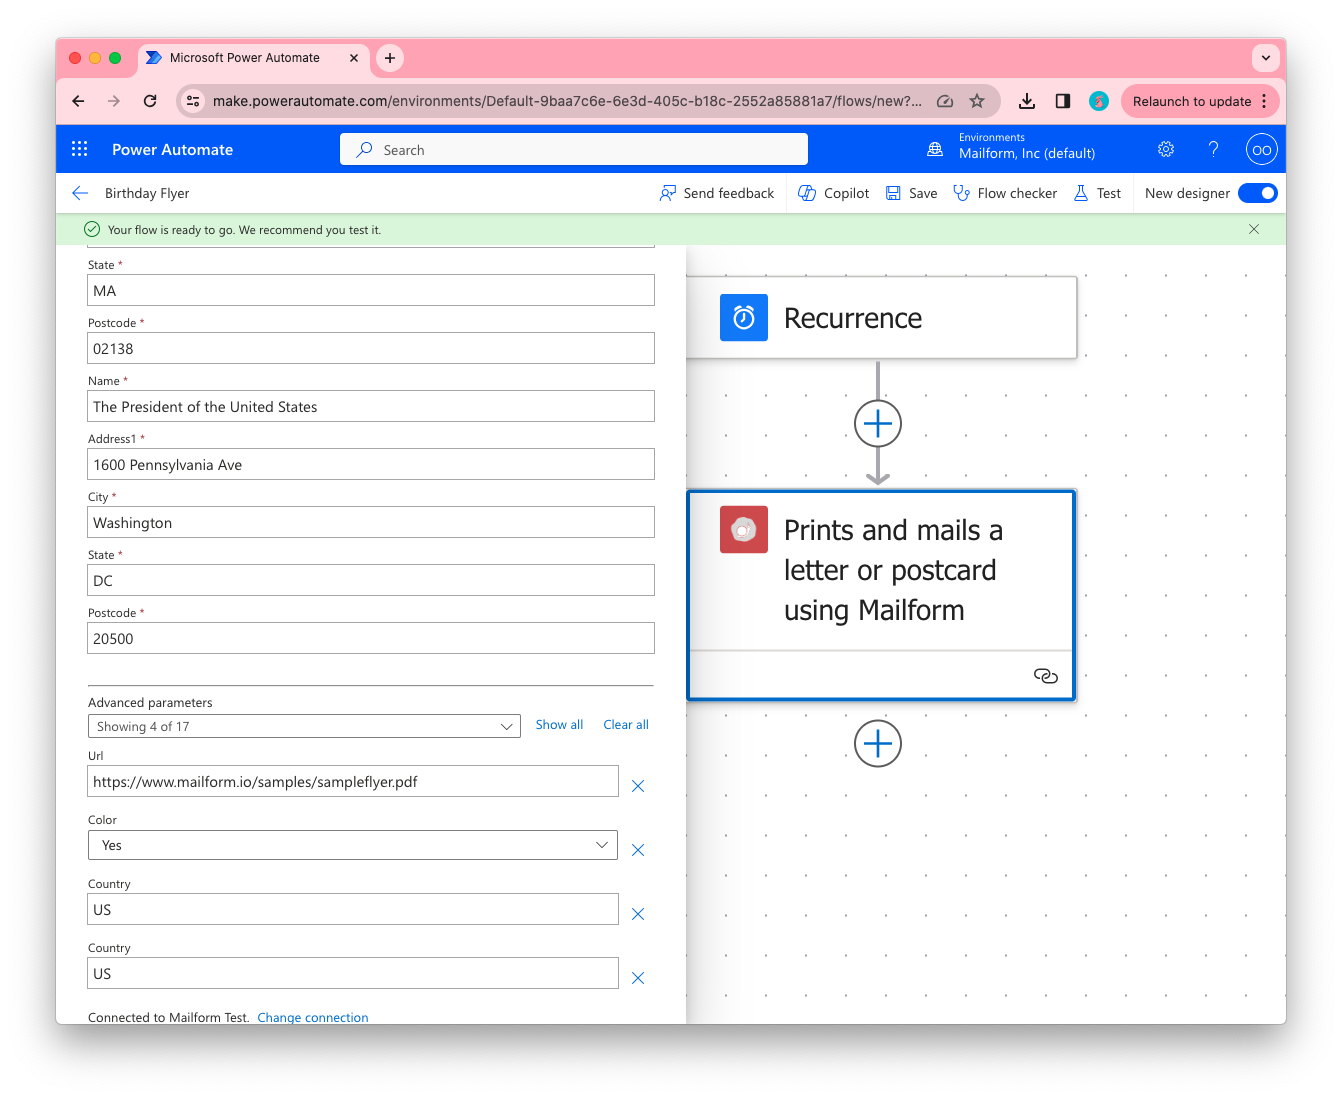
In the dialog, search for Mailform, then select the Prints and mails a letter or postcard using Mailform action.
Fill in the recipient and sender addresses.
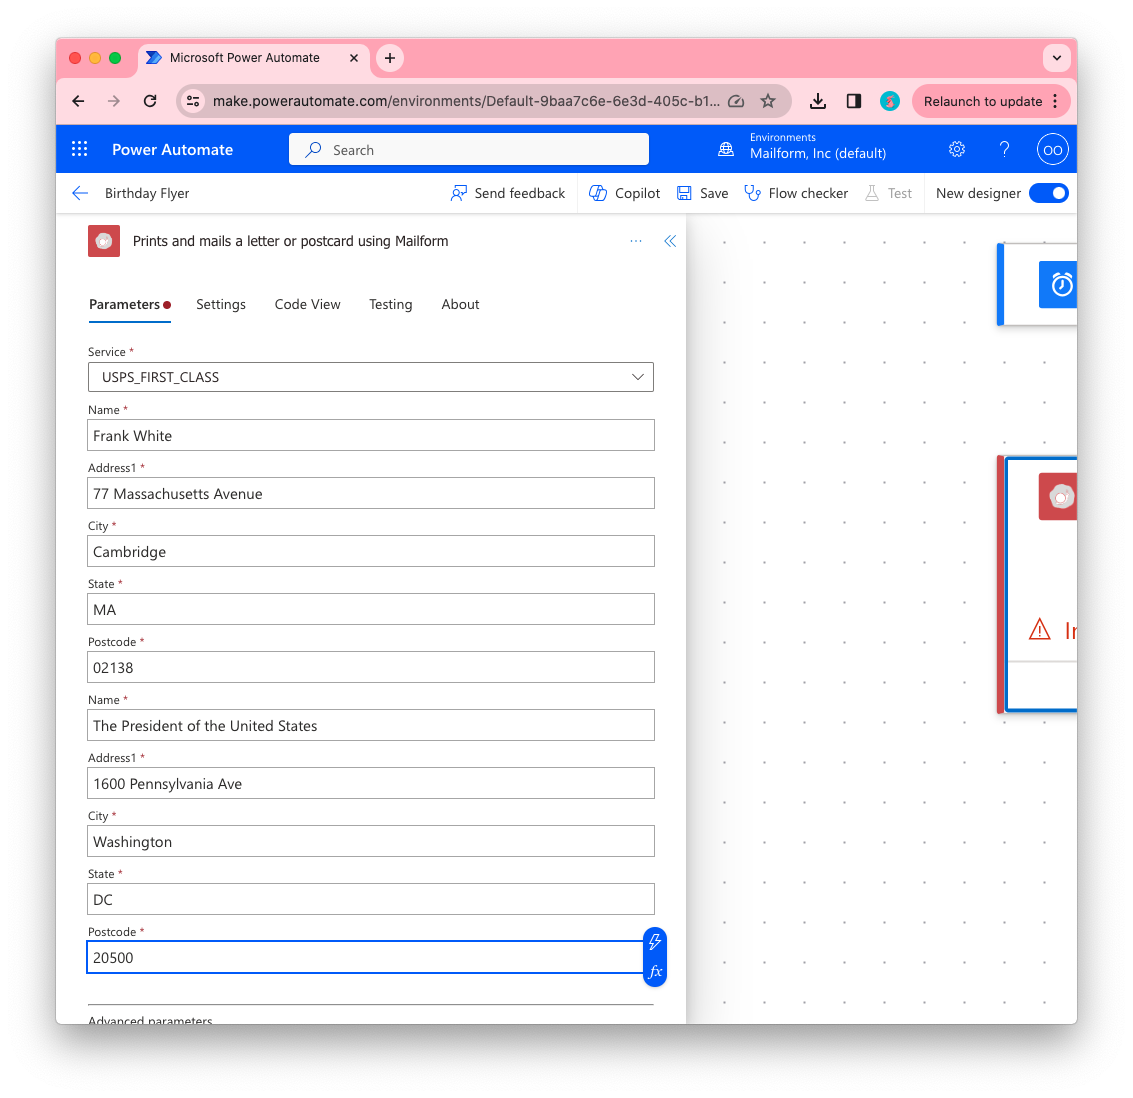
Fill in the document and print specifications:
Click the Advanced Parameters option and then select url, and then enter the value https://www.mailform.io/samples/sampleflyer.pdf.
Click the Advanced Parameters option and then select color, and then select Yes.
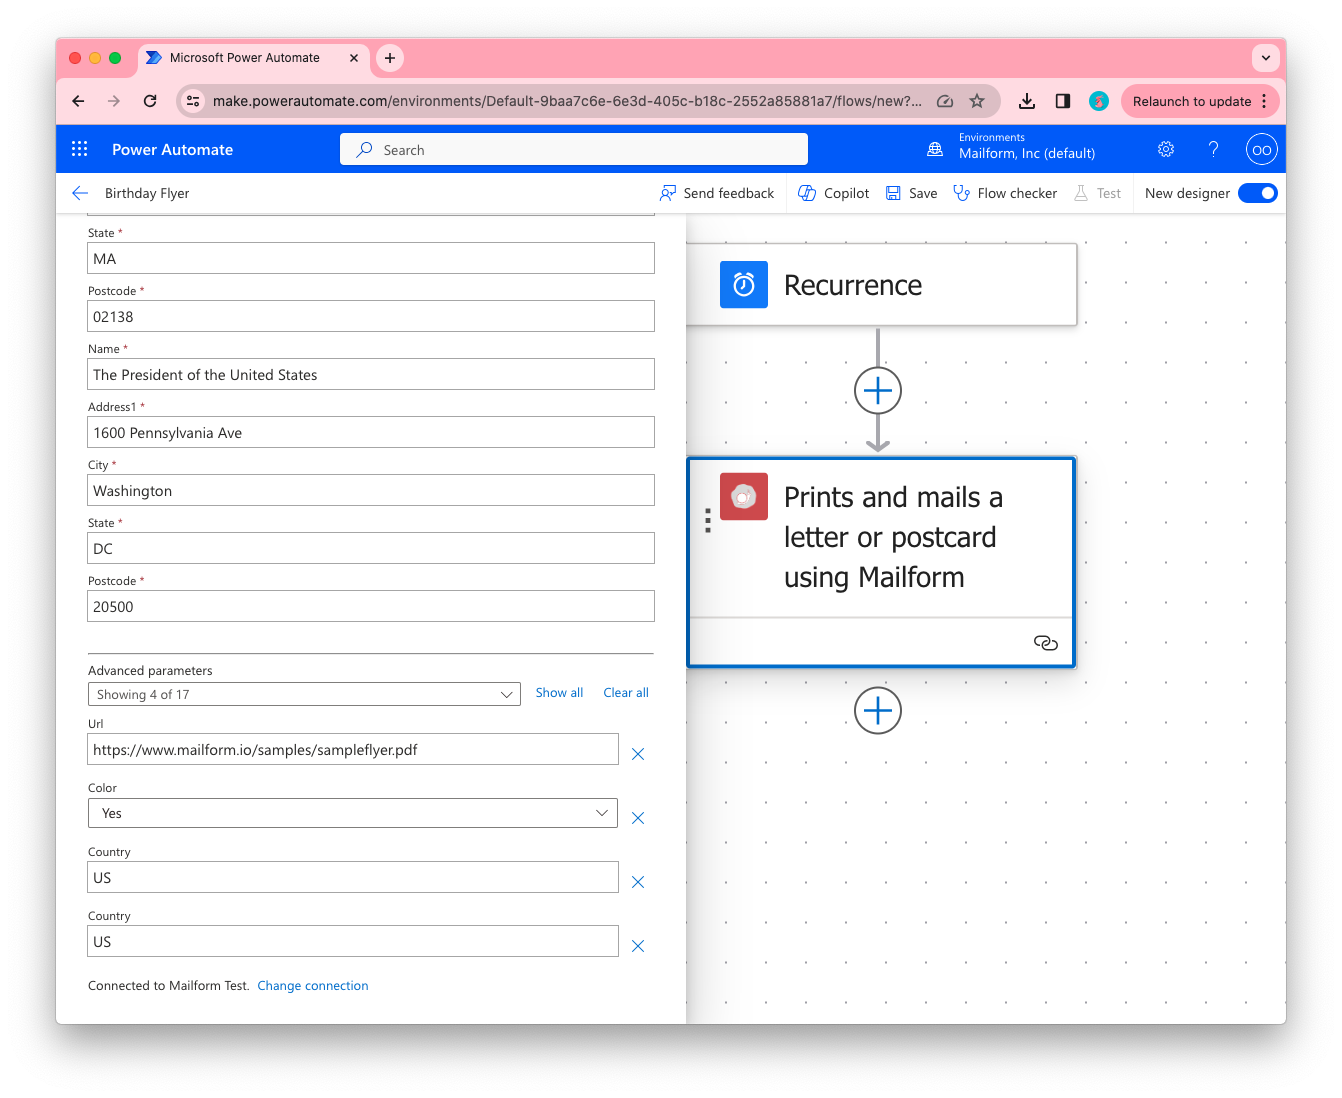
Click the Save button at the top of the editor, and we’re done. When the flow runs, the order will be placed within the Mailform account associated with the API key.
Try it out, today!