
How to add contacts to a mailing list from an address file
Mailform is the easiest way to send mail right from your computer, and our new and improved address book makes that even easier now. Our new mailing list feature makes it simple to send a letter to multiple recipients. Here's how to add contacts to a mailing list from a CSV or Excel address file:
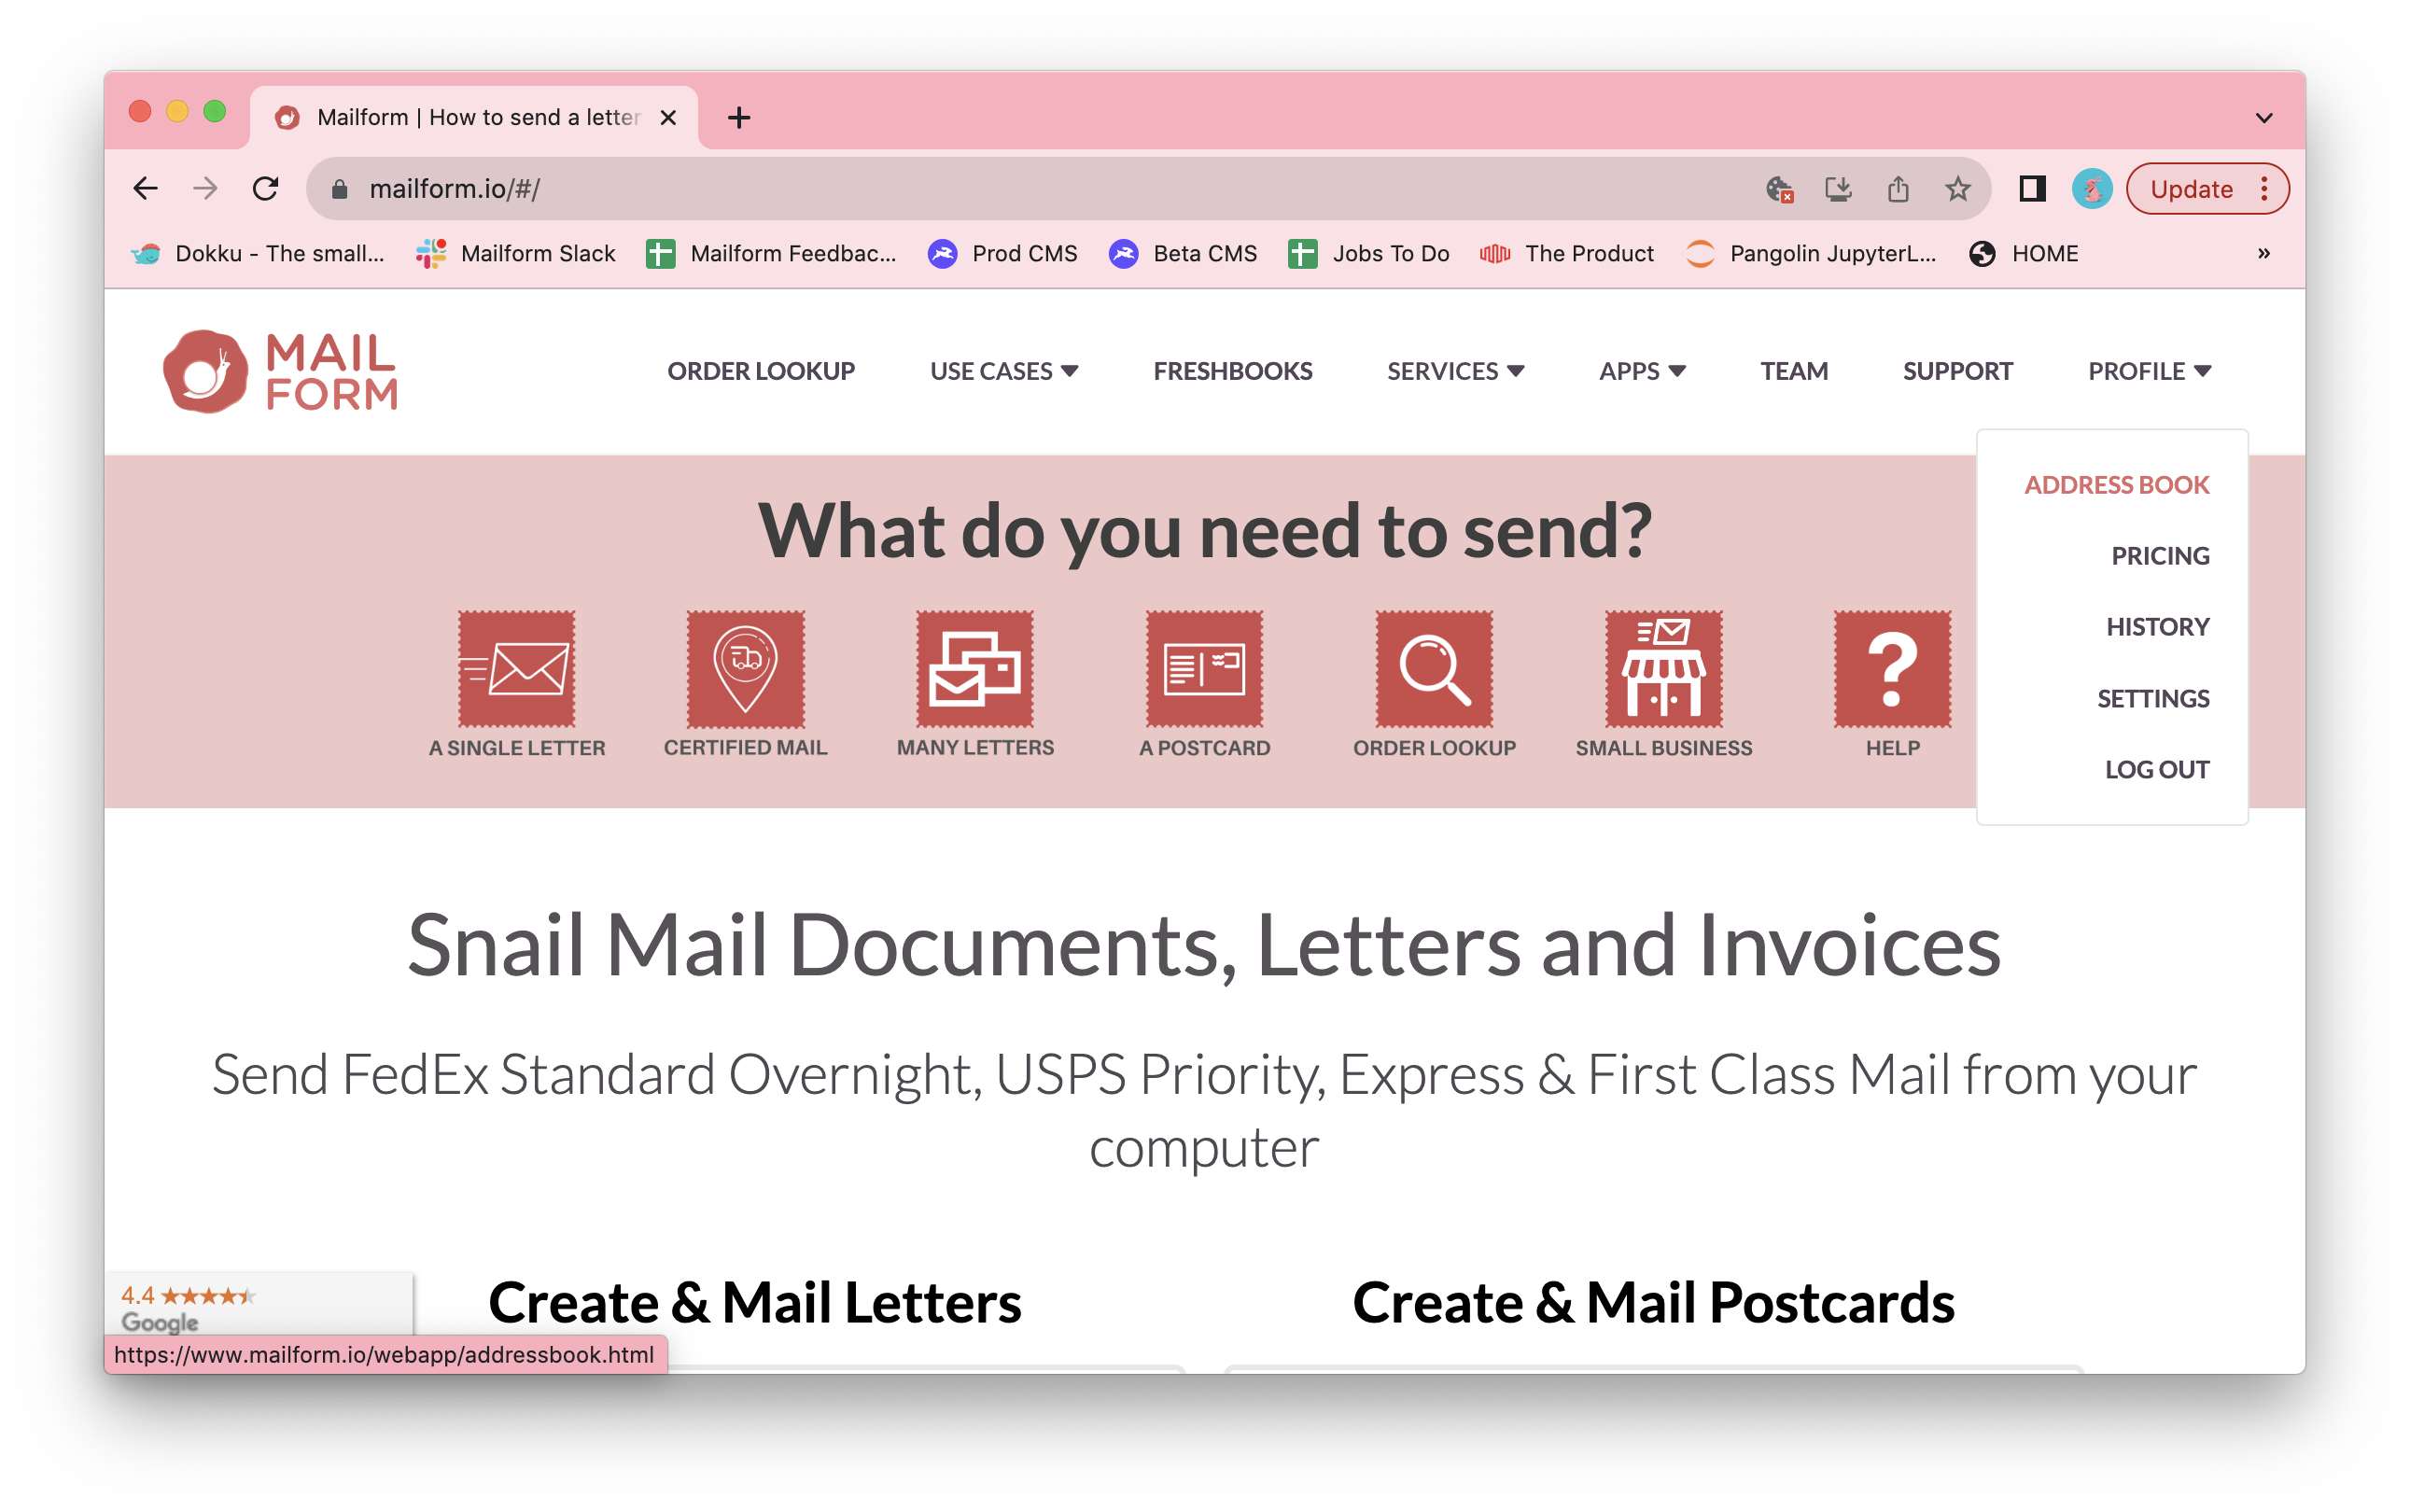
Visit the Mailform address book by logging into your Mailform account at https://www.mailform.io/ and then clicking on the Profile dropdown in the top right. You can also visit https://www.mailform.io/webapp/addressbook.html.
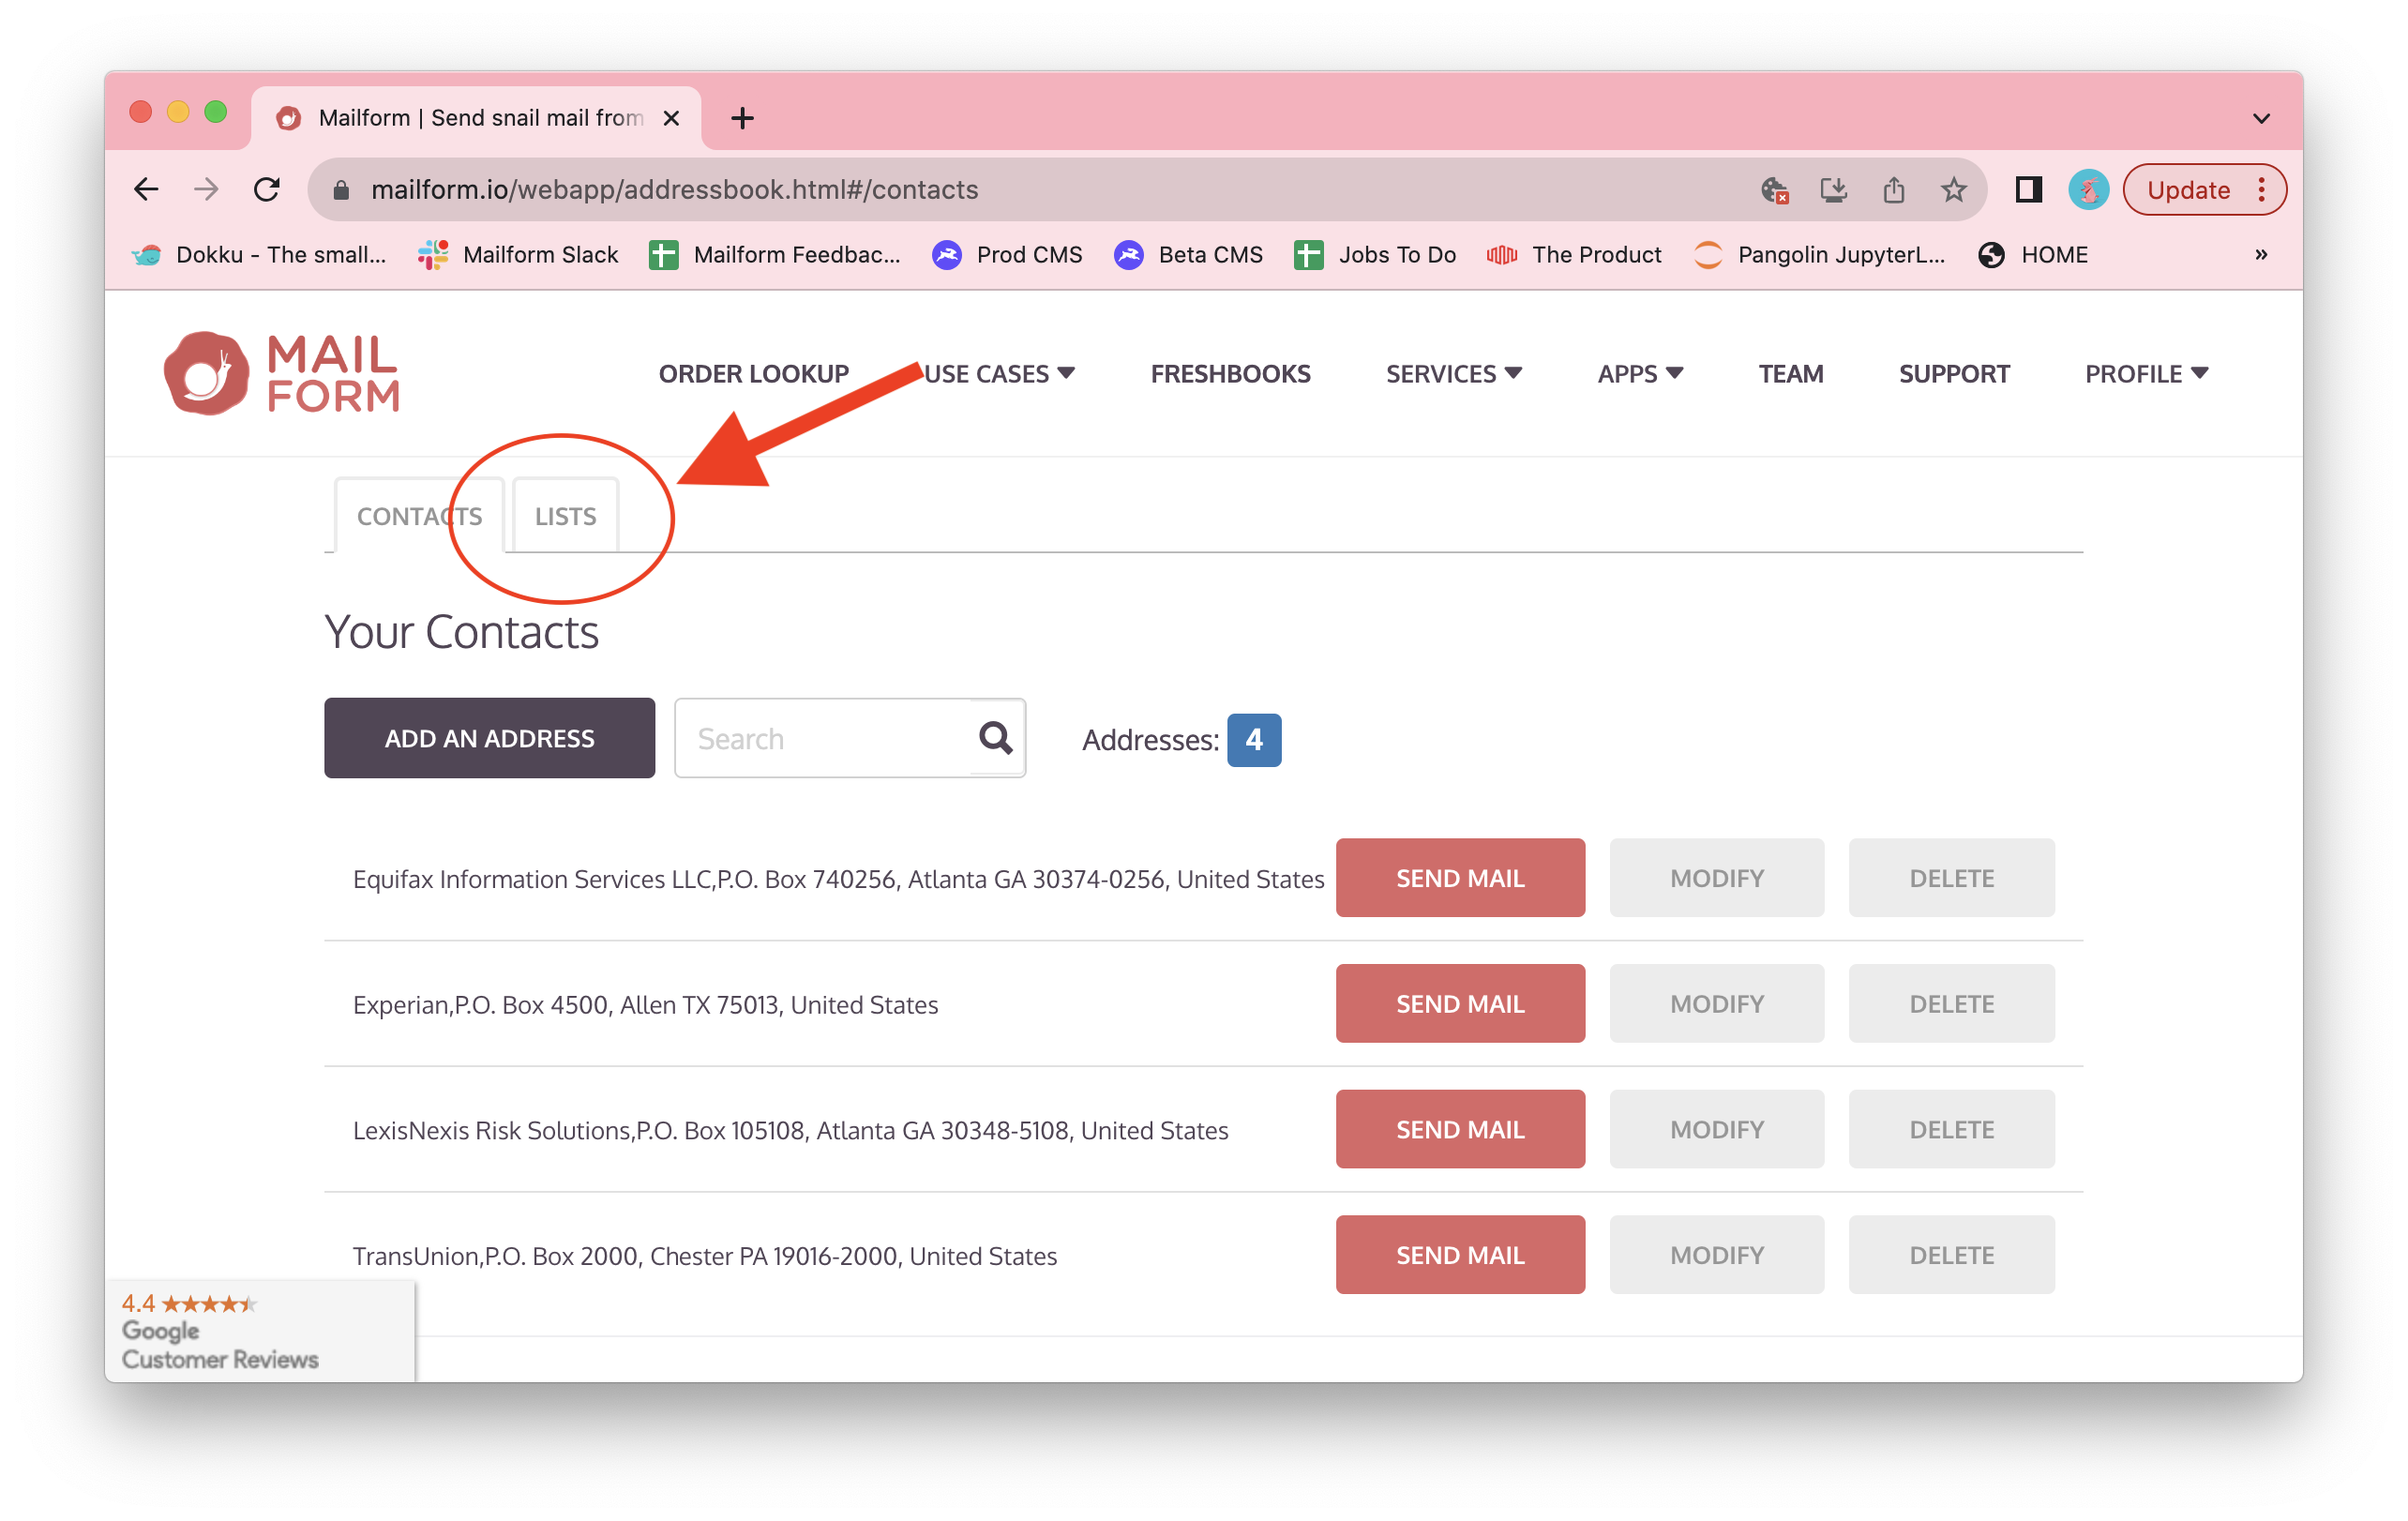
Click on the Lists tab to switch from contact management to list management.
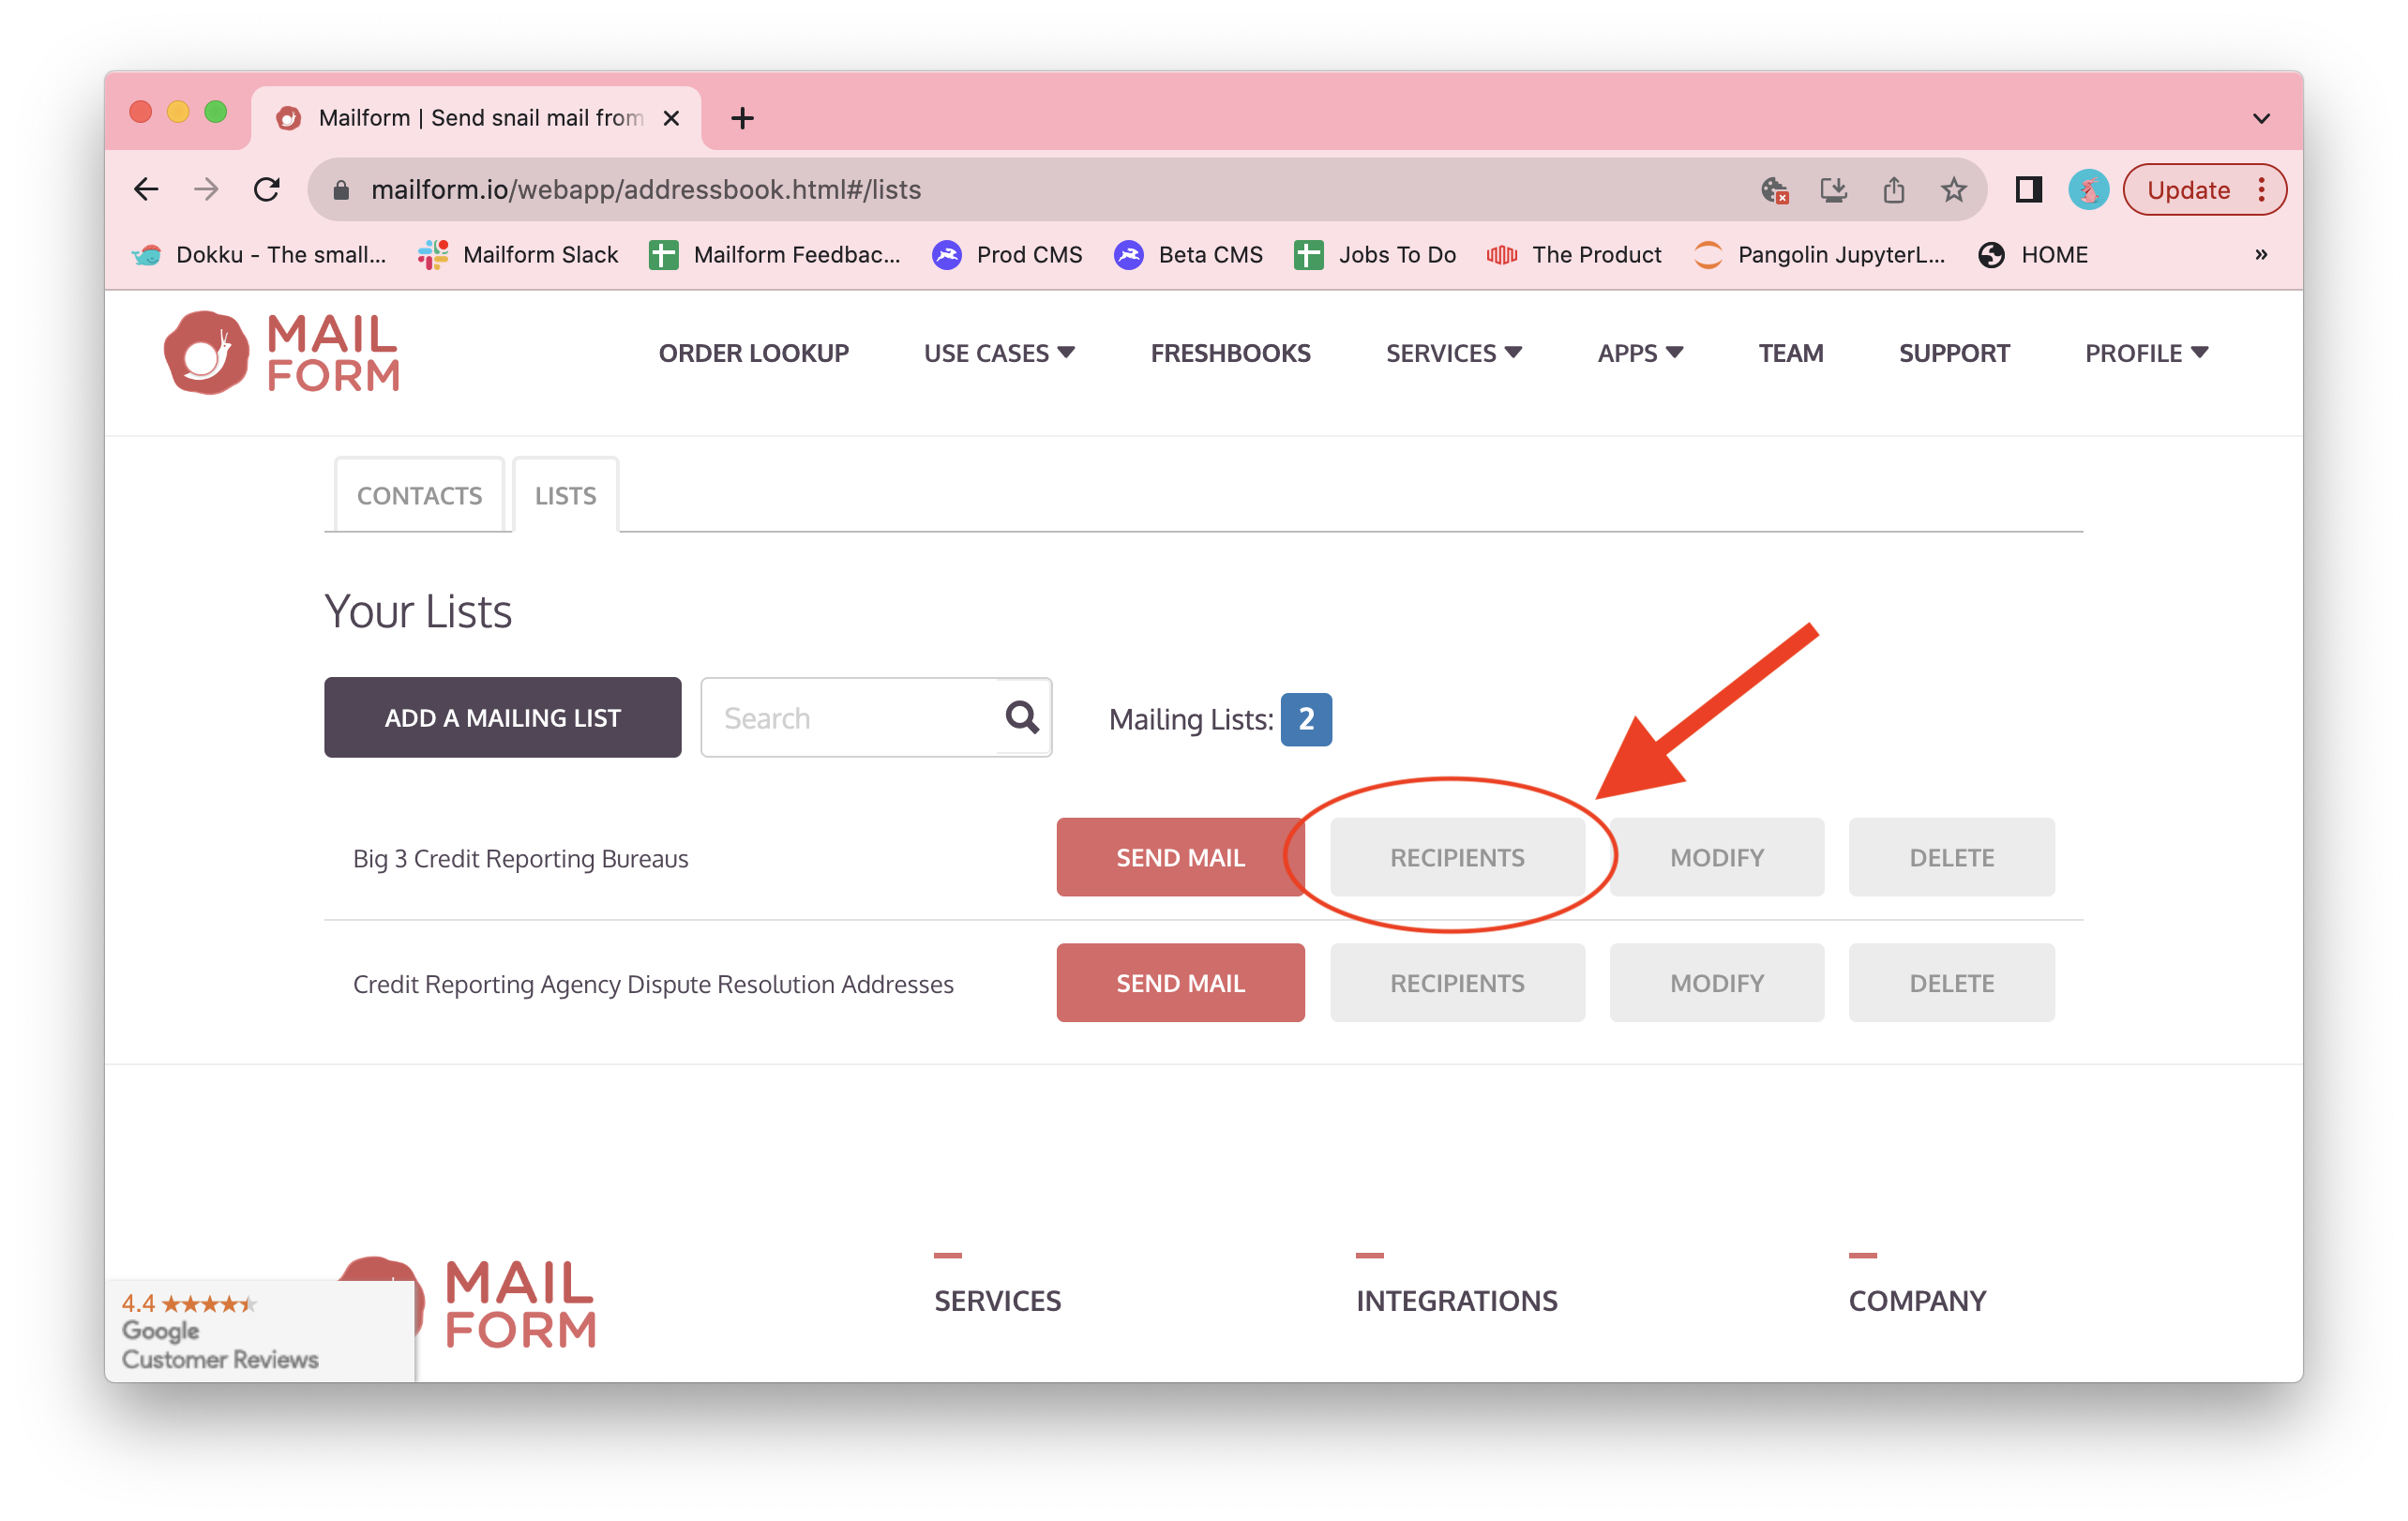
Click the Recipients button in the row for the mailing list you'd like to add the recipients to.
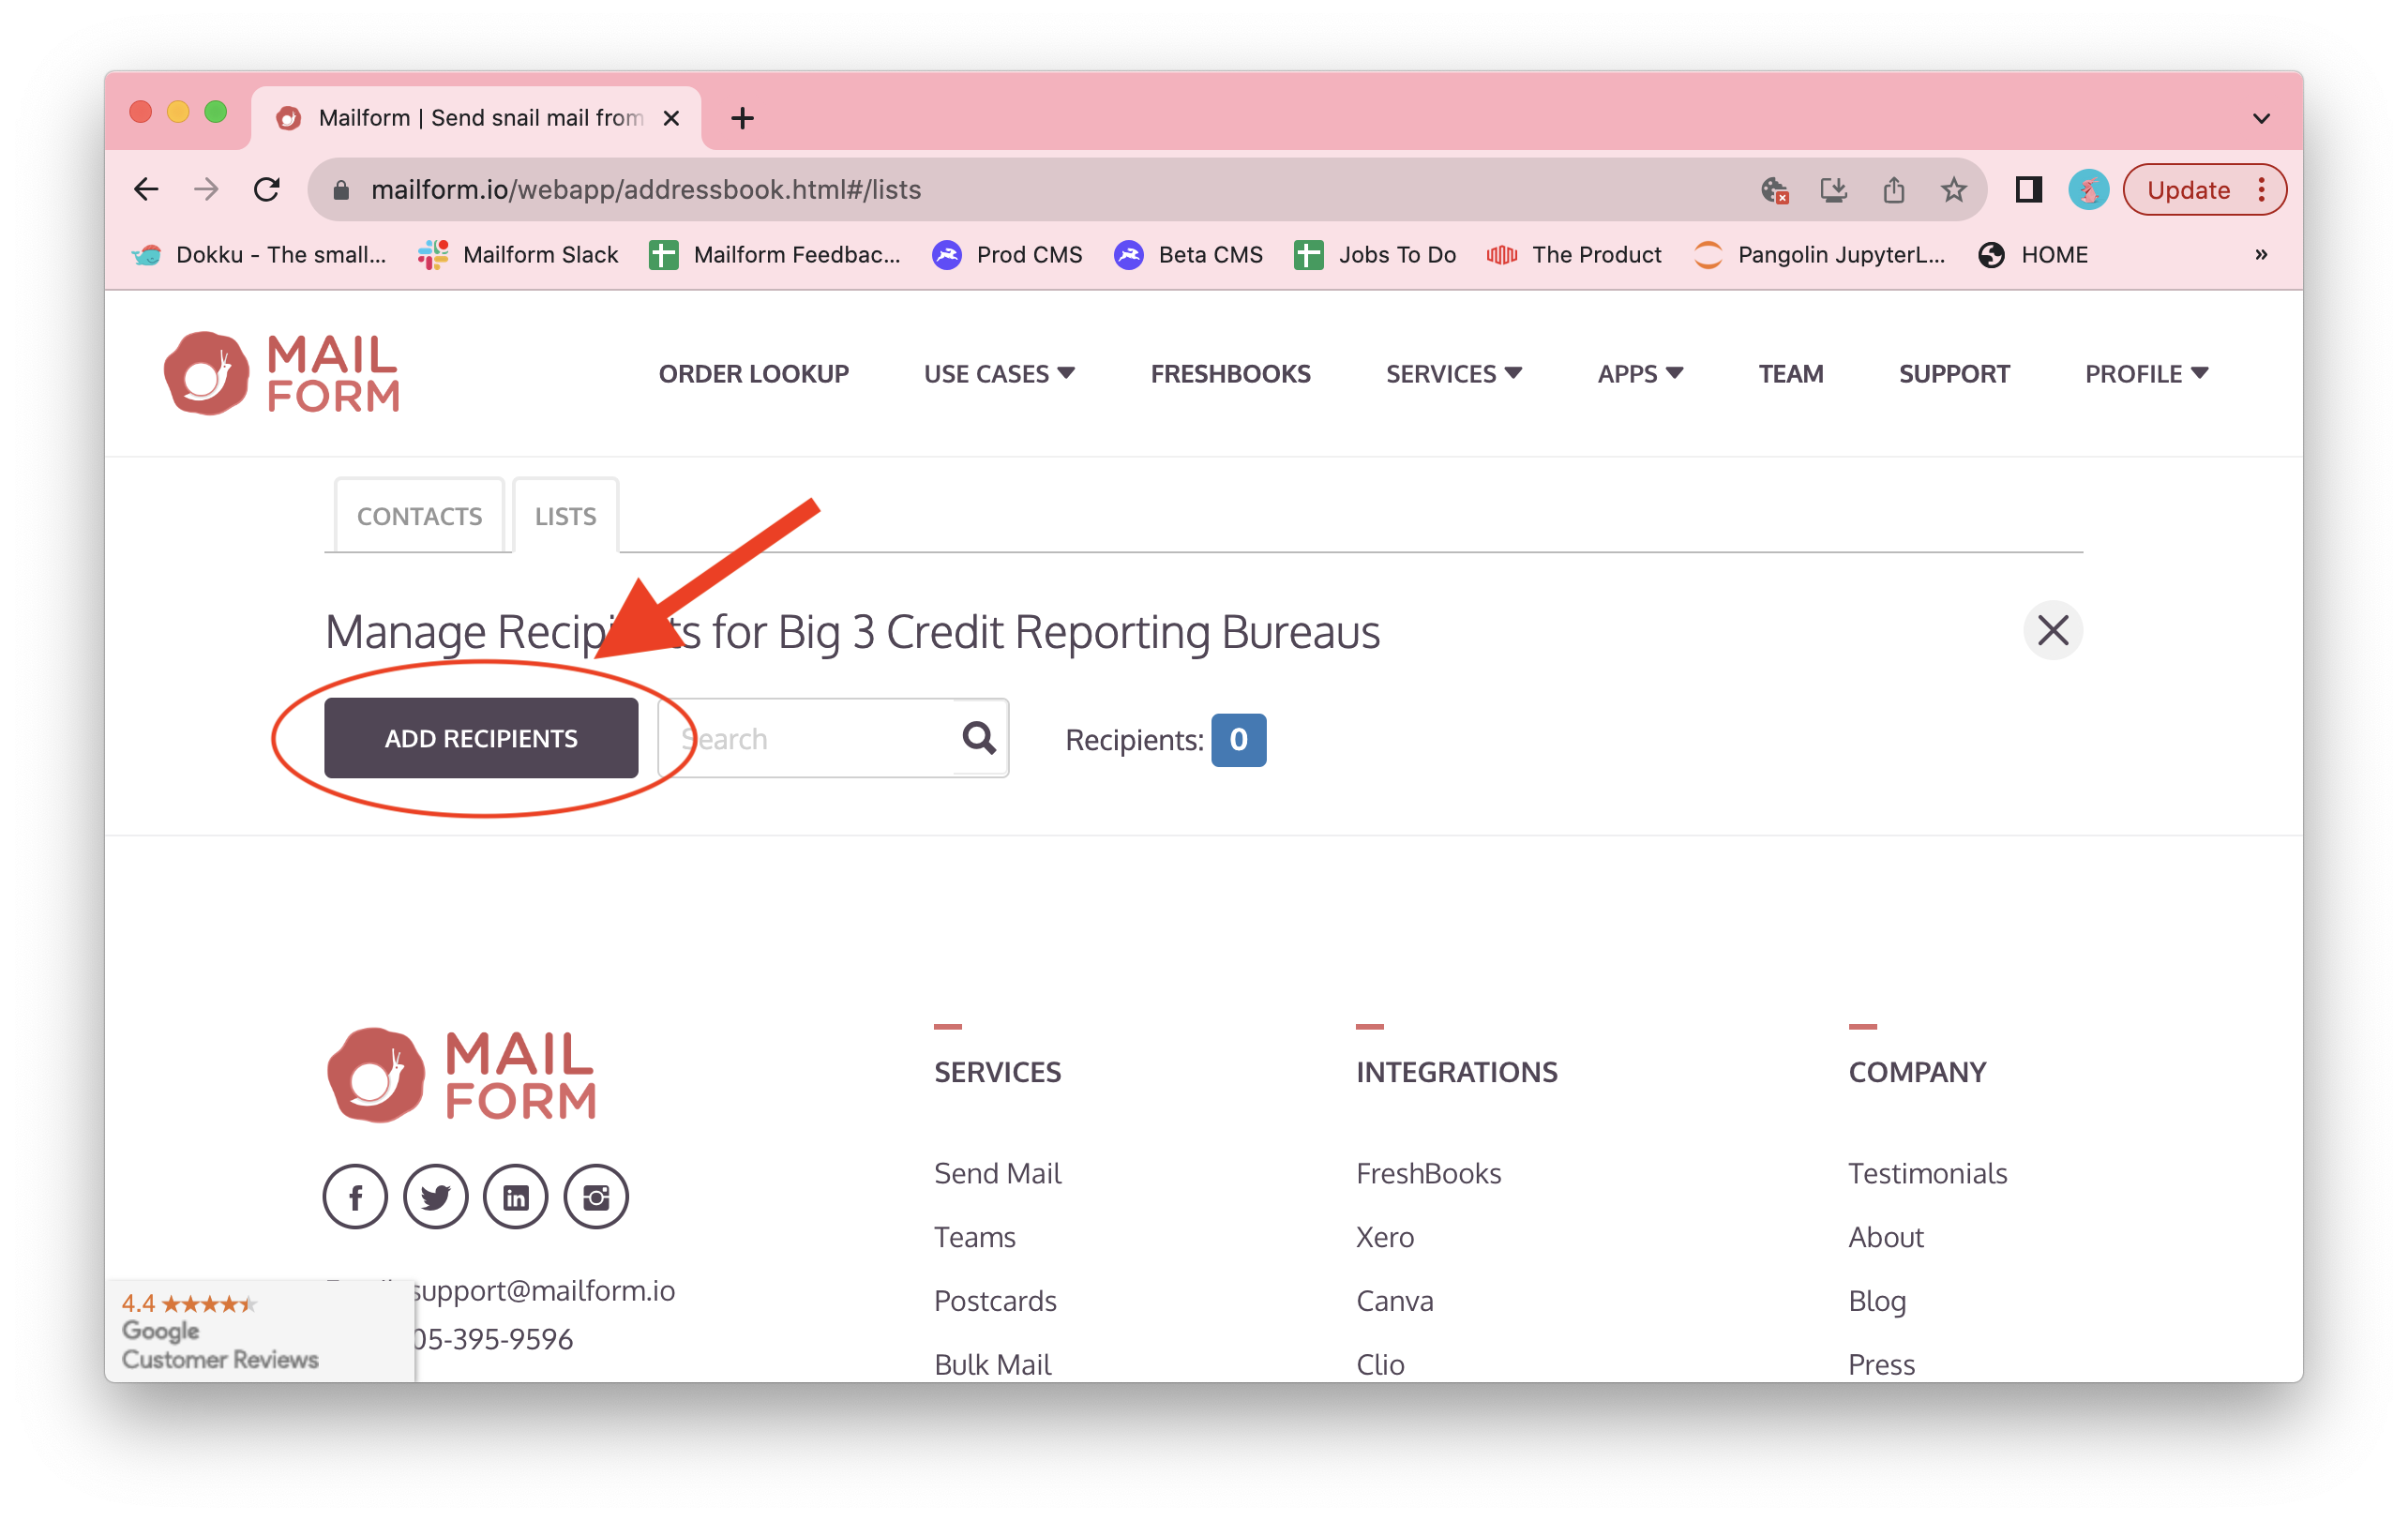
The list of recipients will be shown. Click the Add Recipients button.
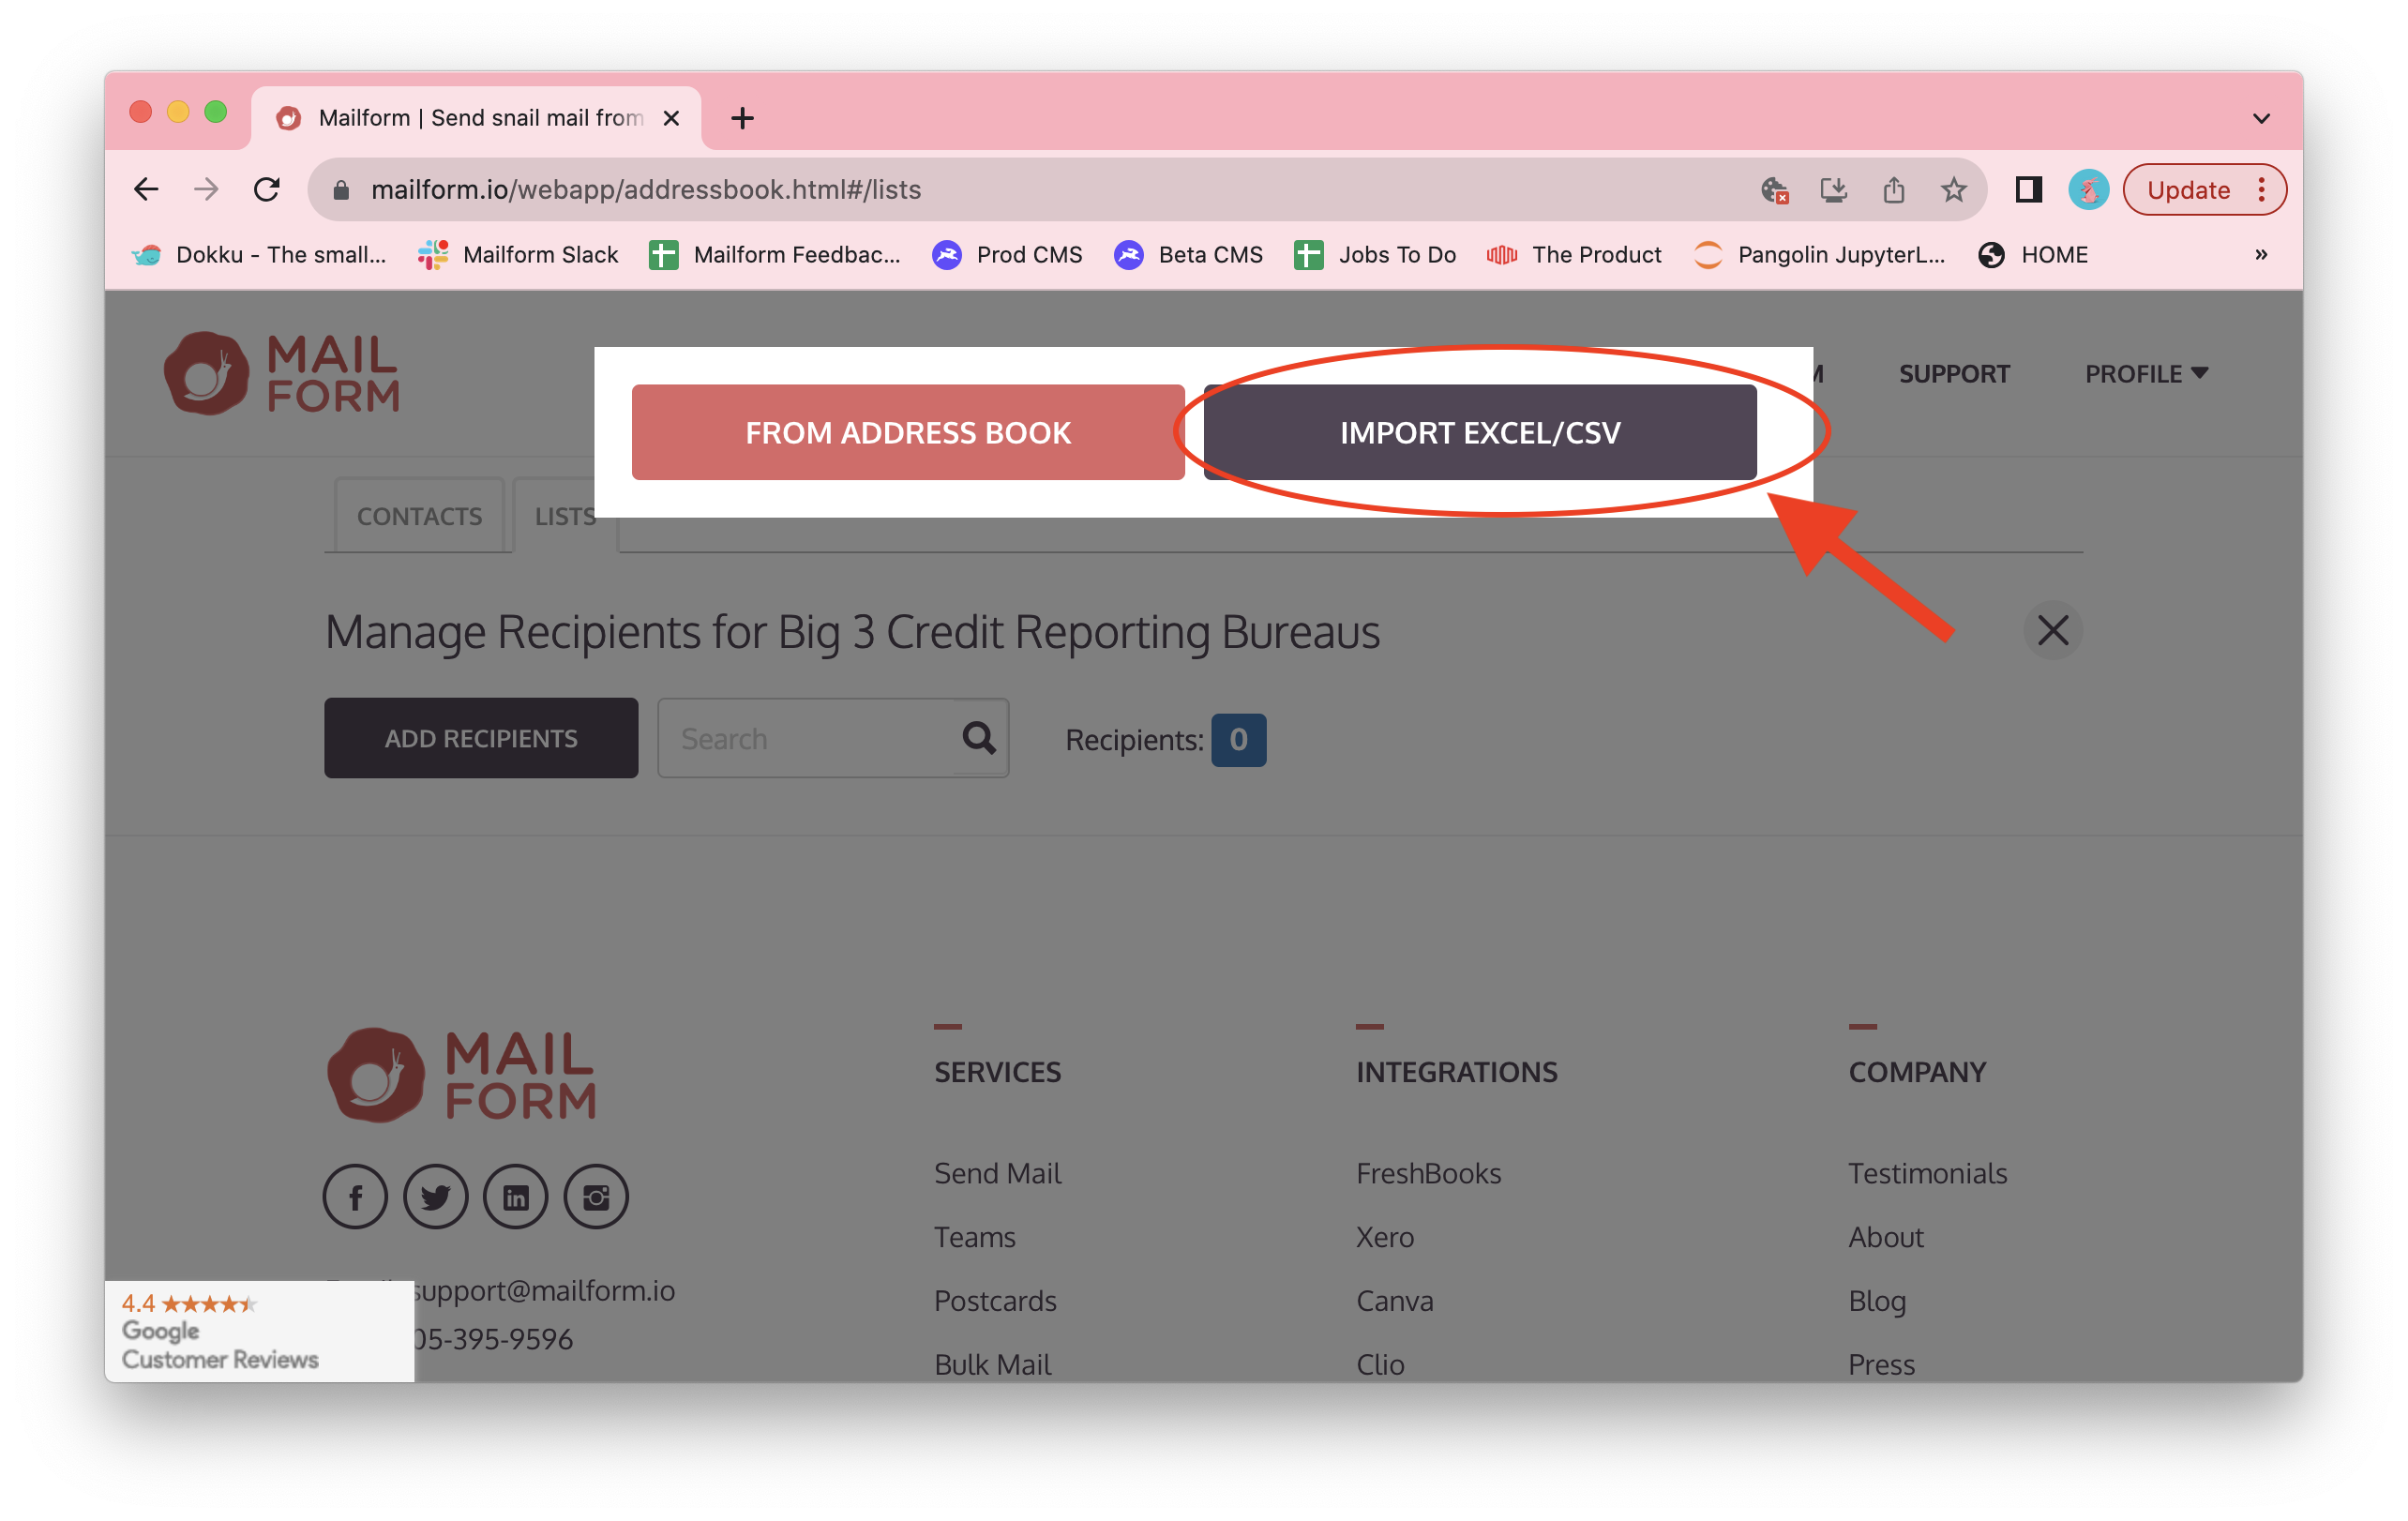
You'll be prompted to pick a source for the recipients. Choose Import Excel/CSV.
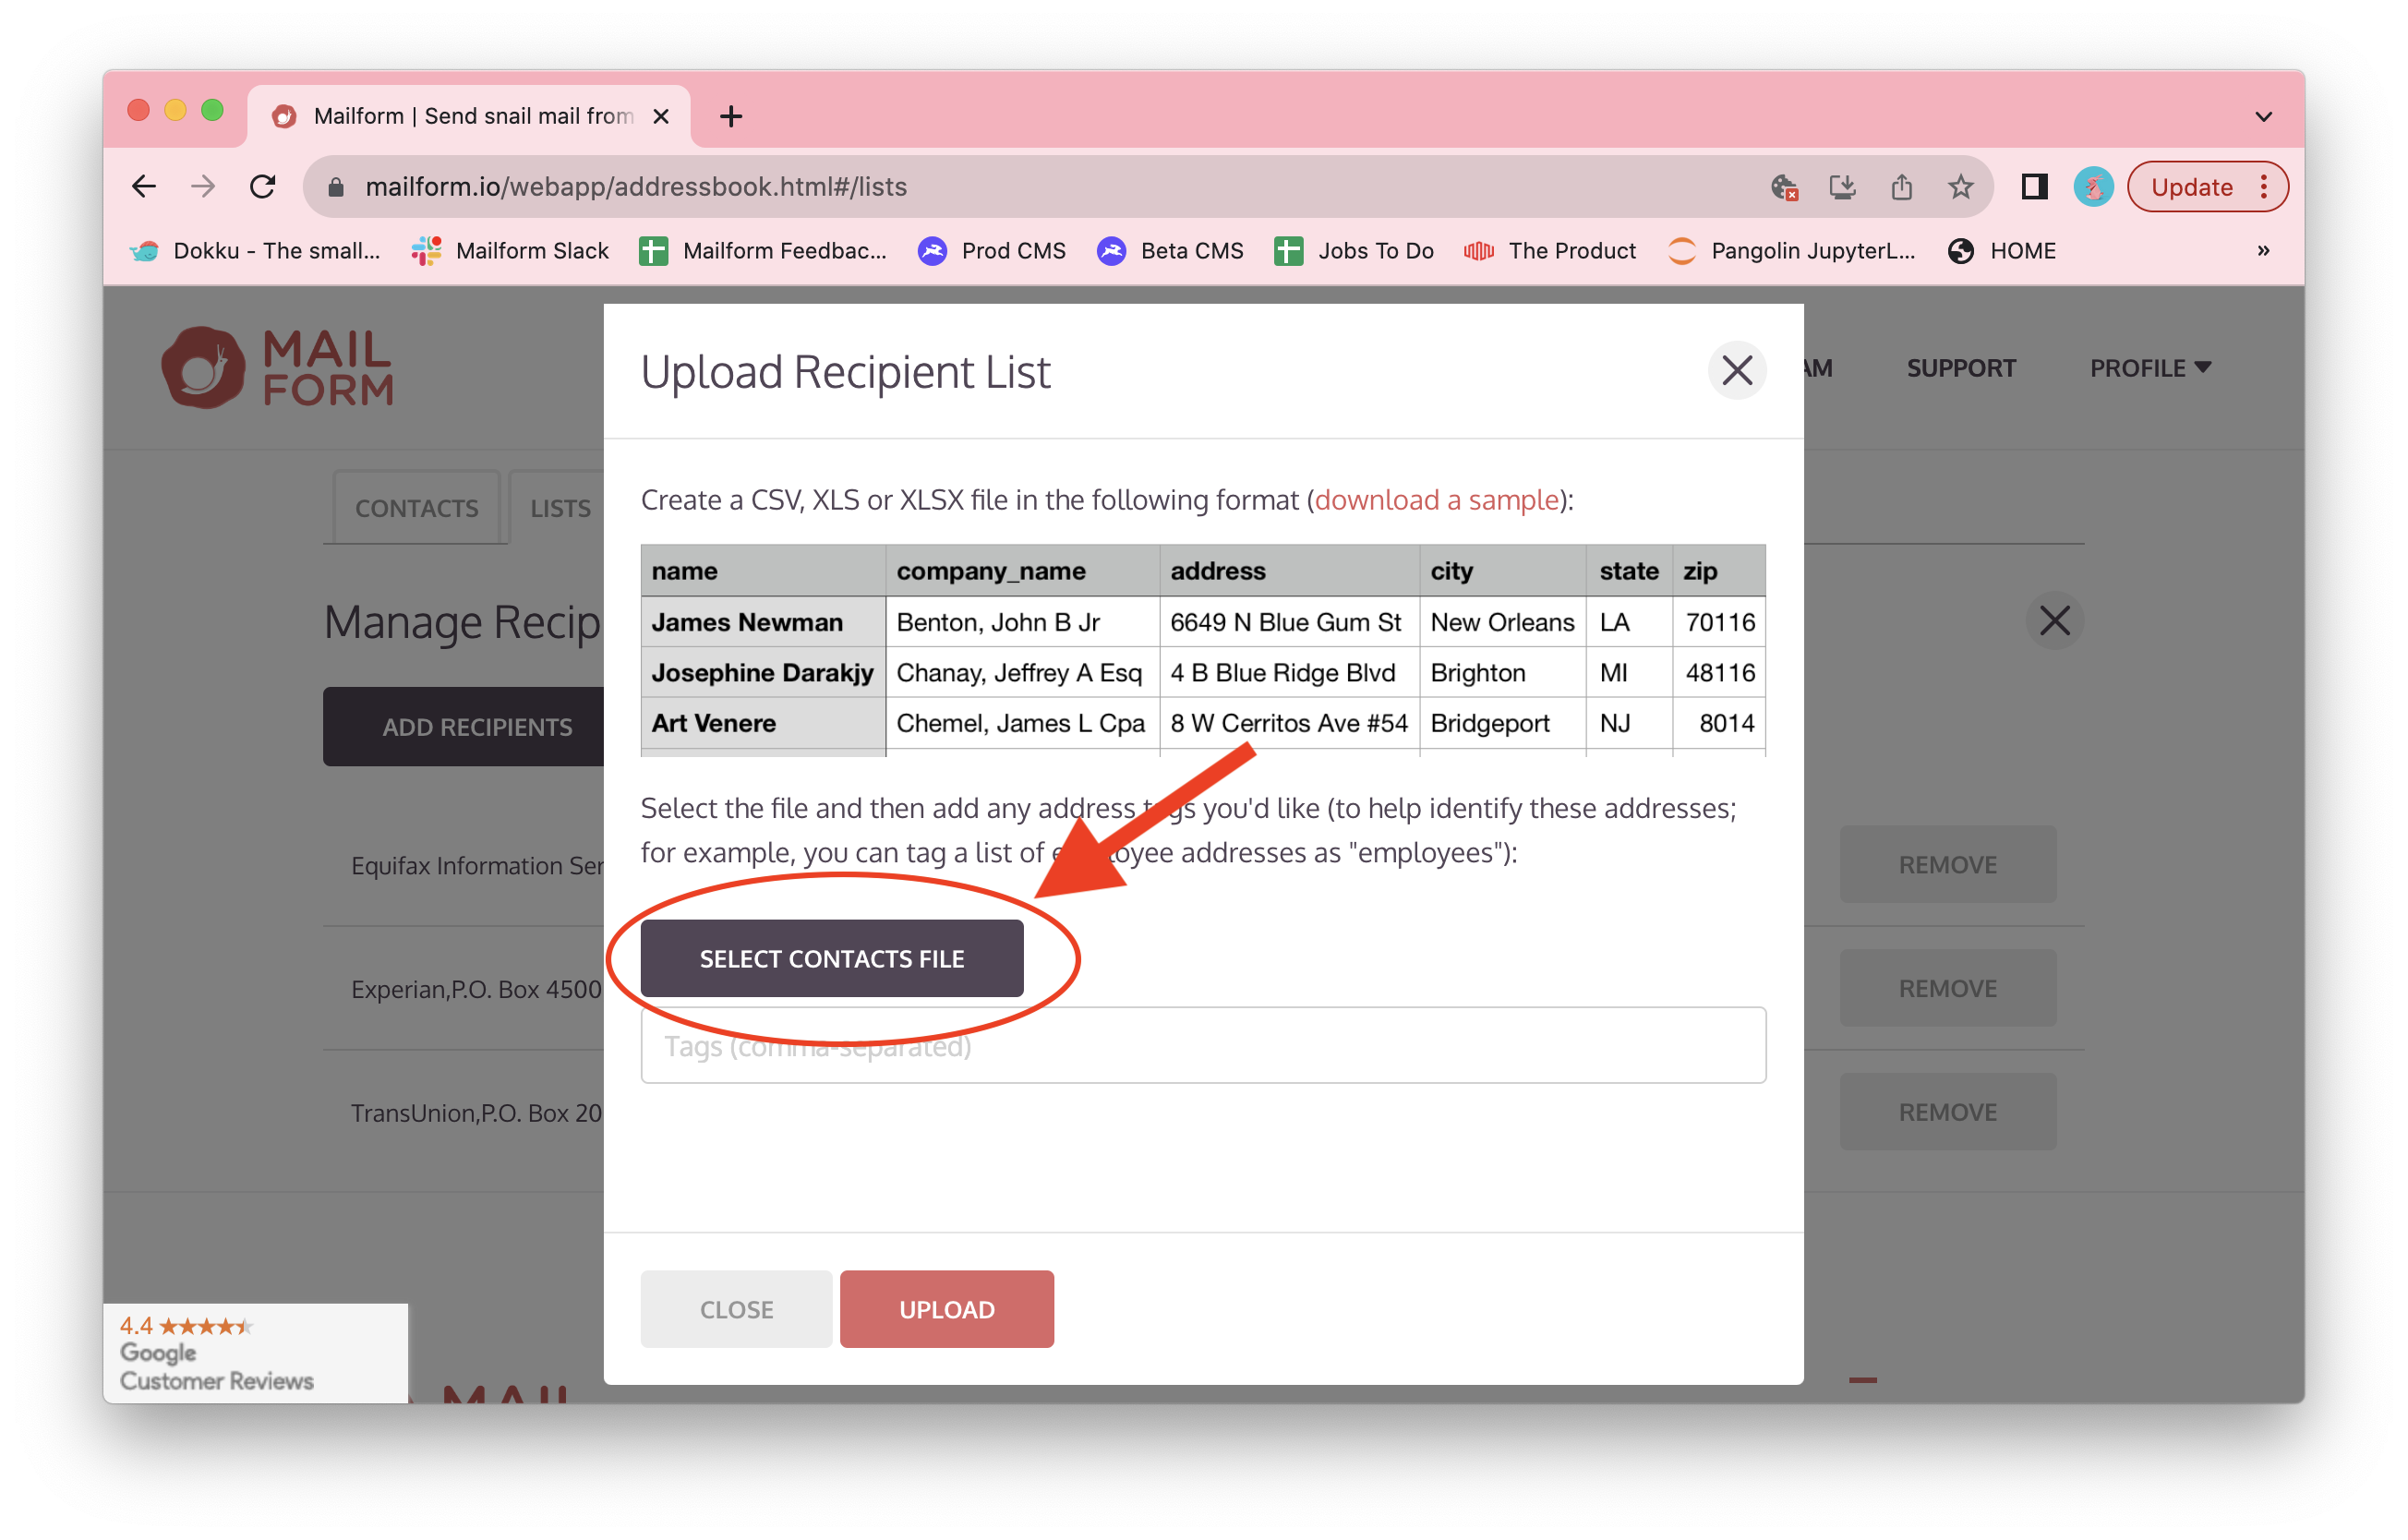
The contact list file upload dialog will show. Click the Select Contacts File button to choose your contact file.
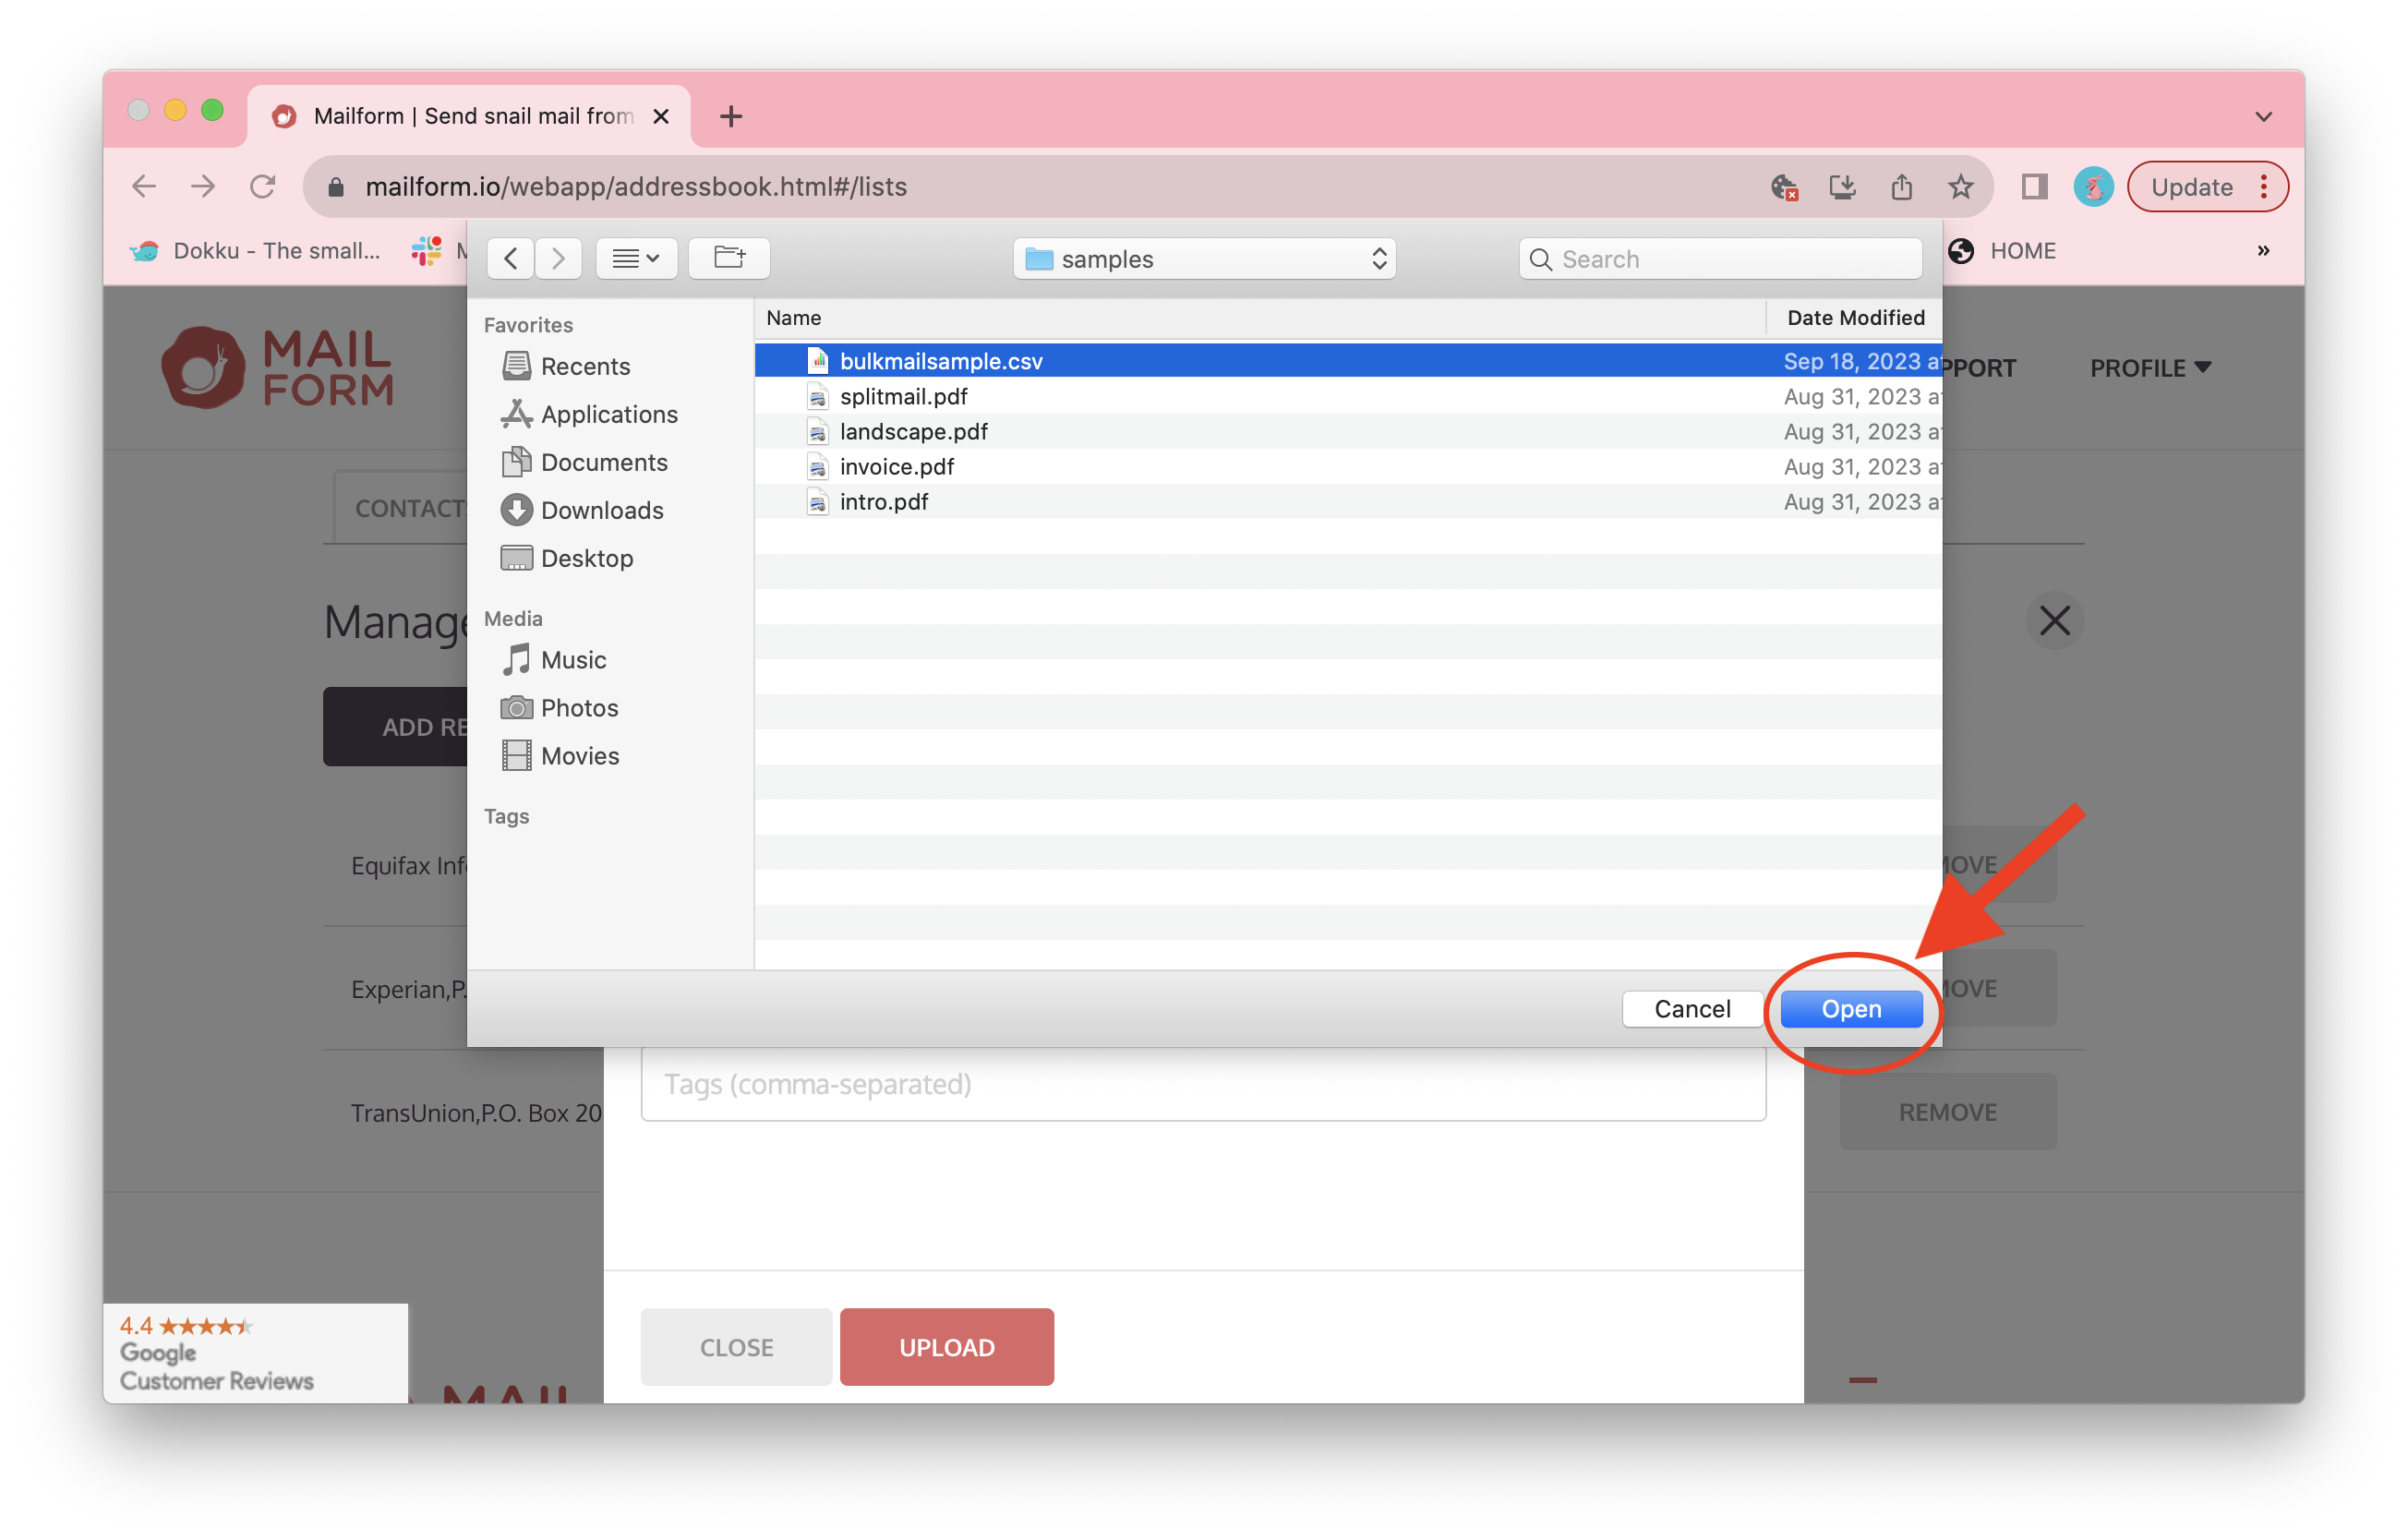
A file picker will open up: you can select one Microsoft Excel file (with the .xlsx extension) or a CSV file. Once the file is selected, click Open to select the file and close the picker.
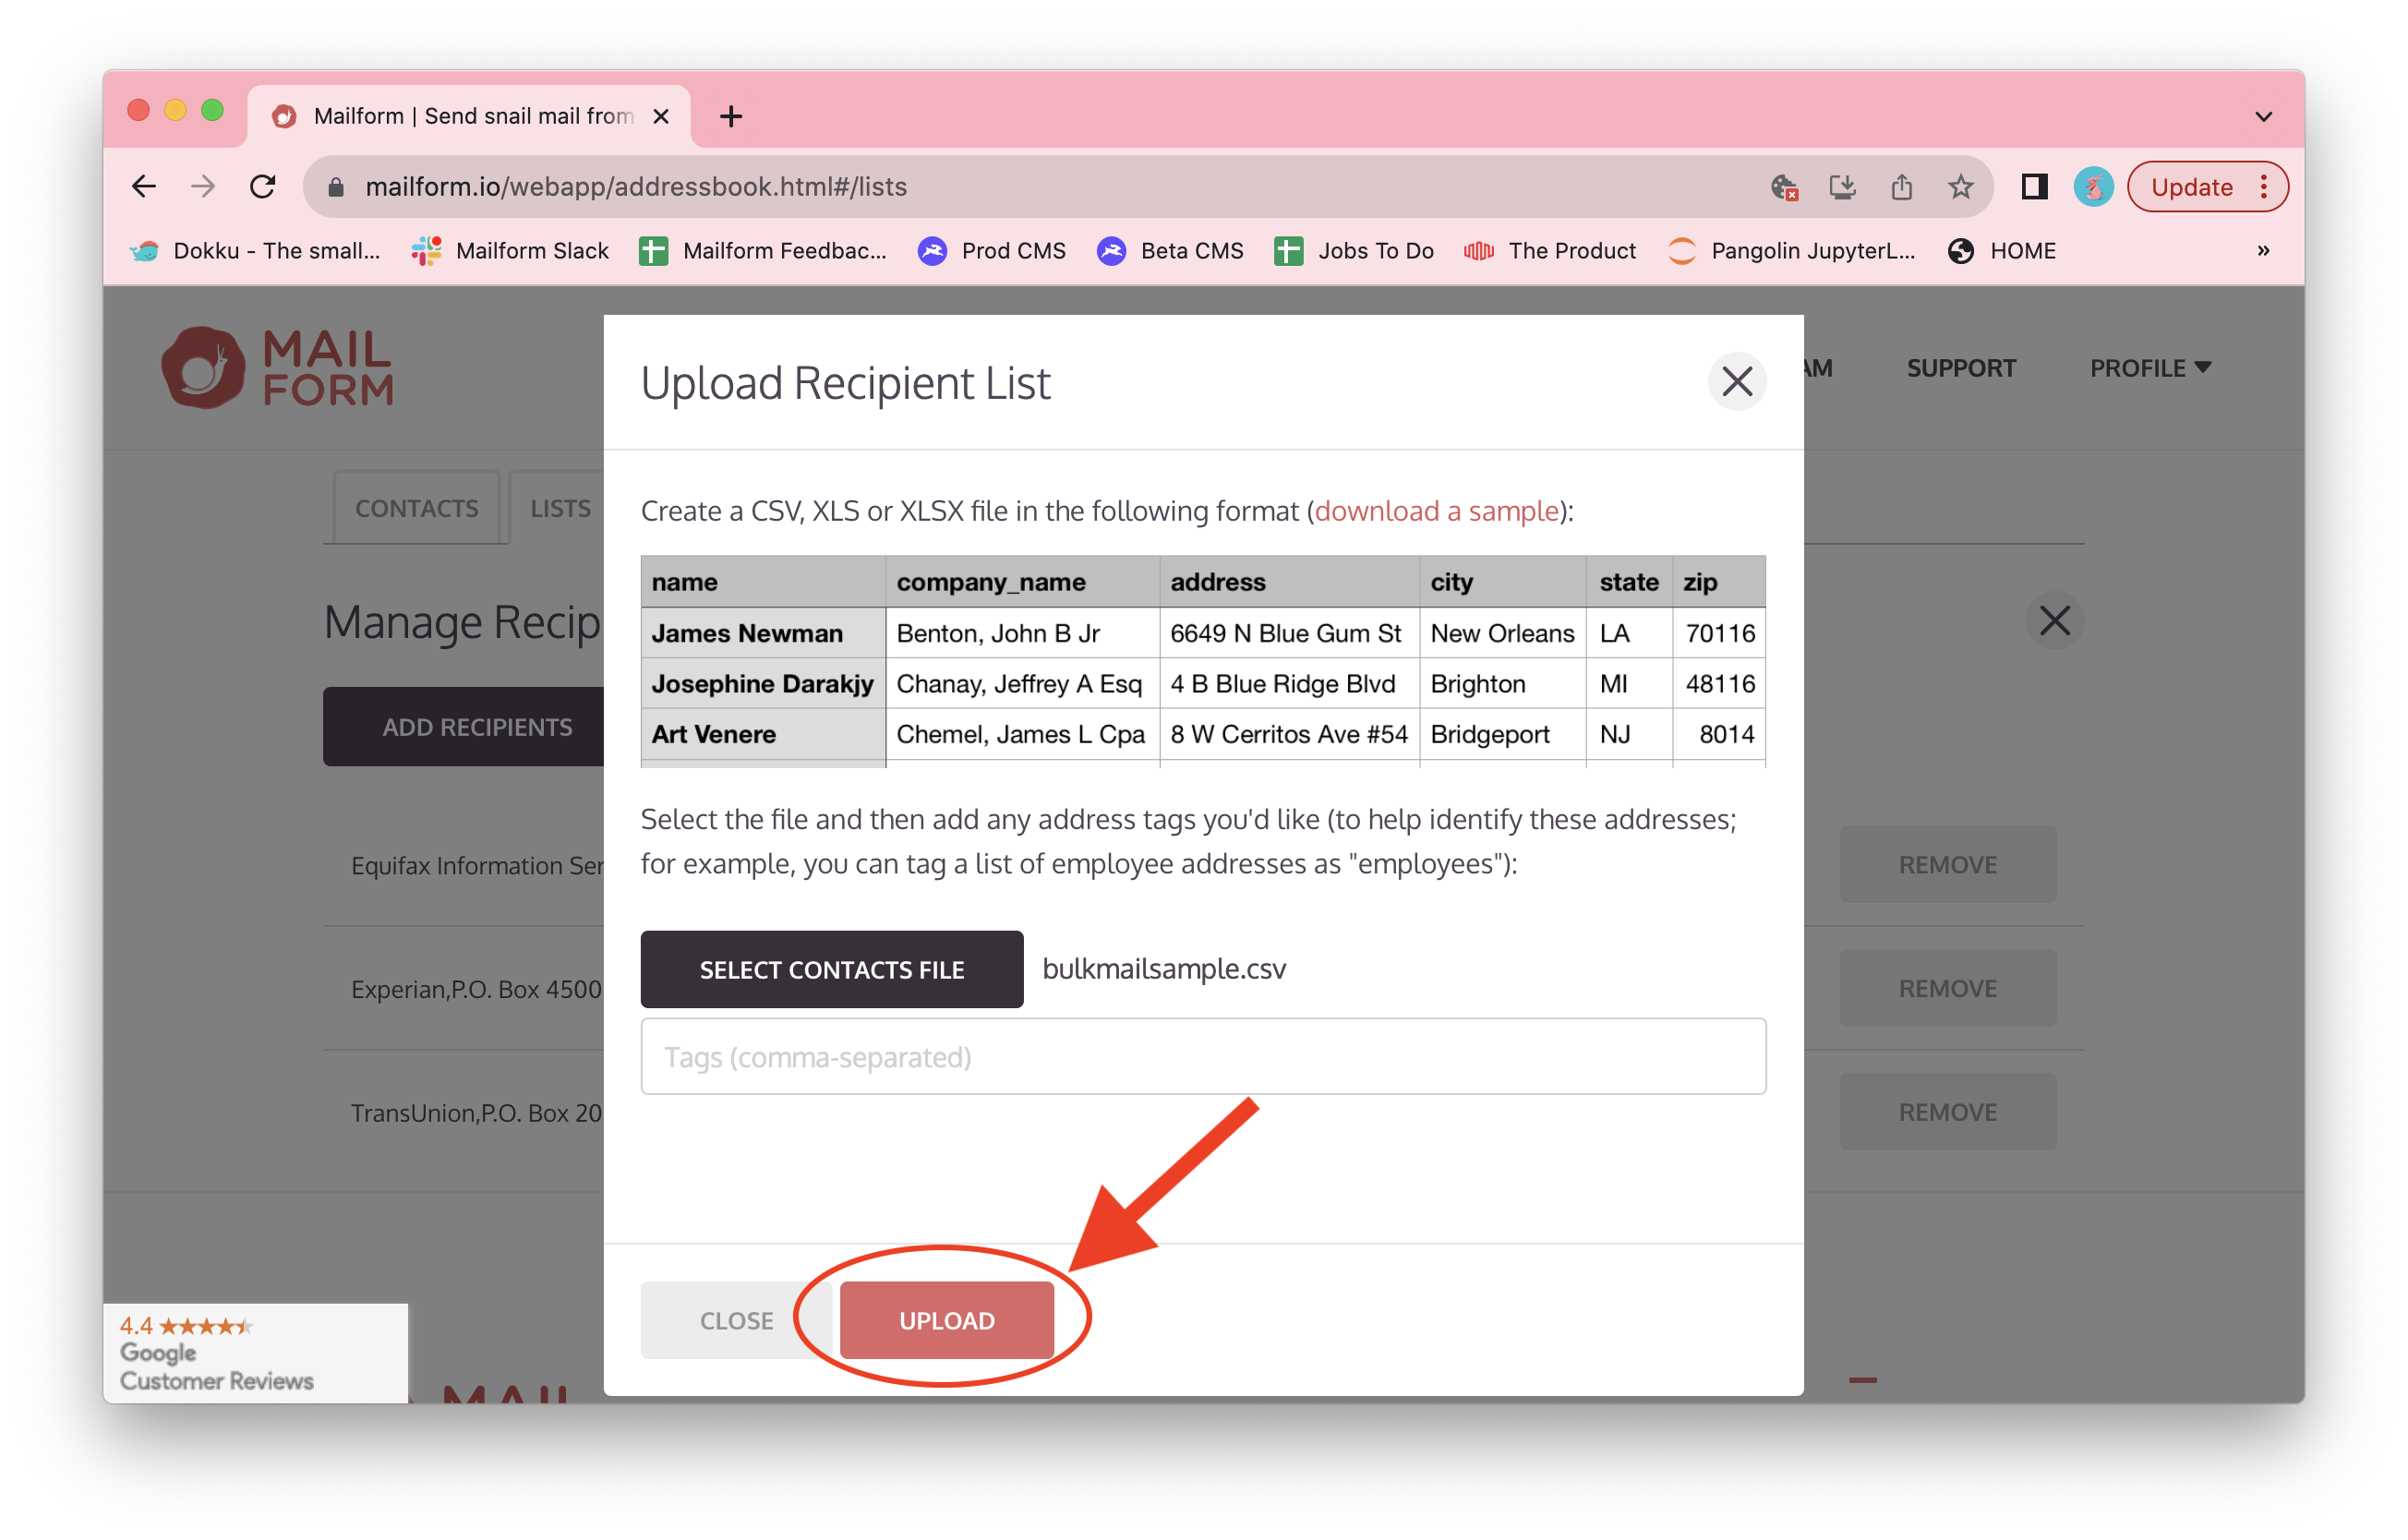
The contact list file upload dialog will update to show the file name. Click the Upload button to start the upload.
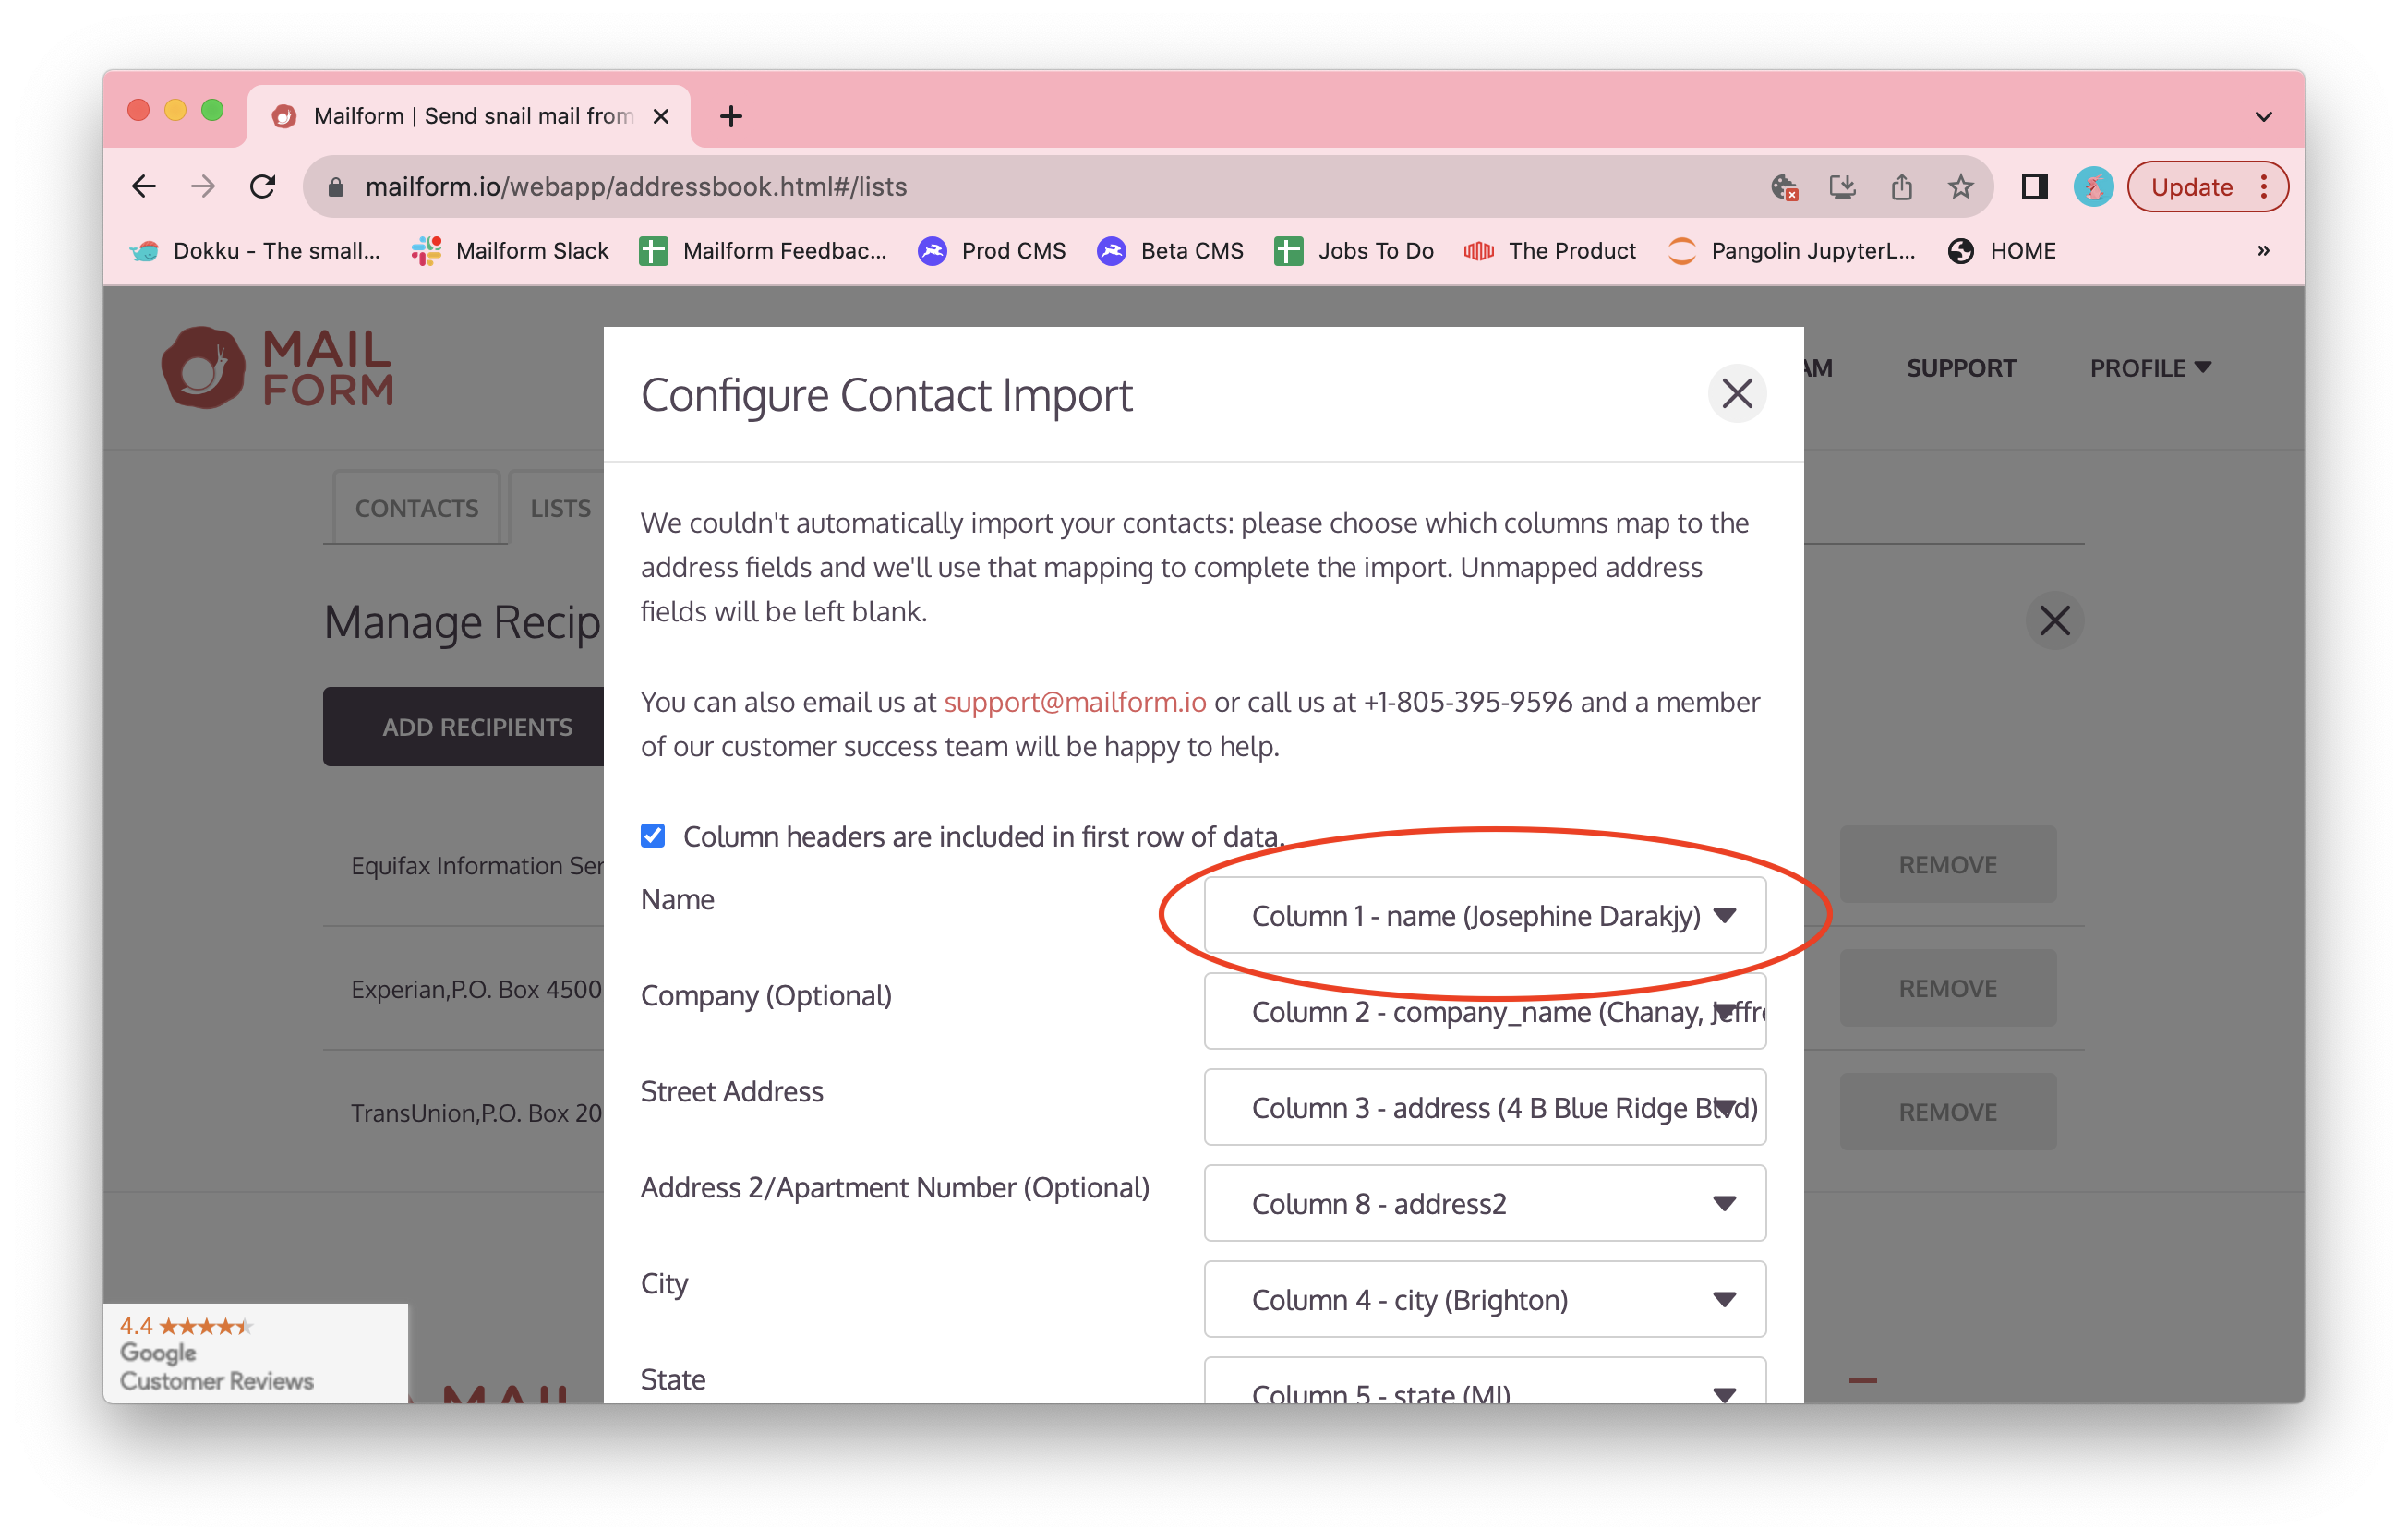
Once the file uploads, you'll be shown the column matching dialog, which lets you choose which columns of the file should be used to create each contact. Mailform will attempt to automatically match the columns in your file to the fields for each contact based on the values in the first row. A sample of what each contact field will look like is shown next to the column number.
Once you've verified the columns, scroll to the bottom of the page and click the Import Contacts button.

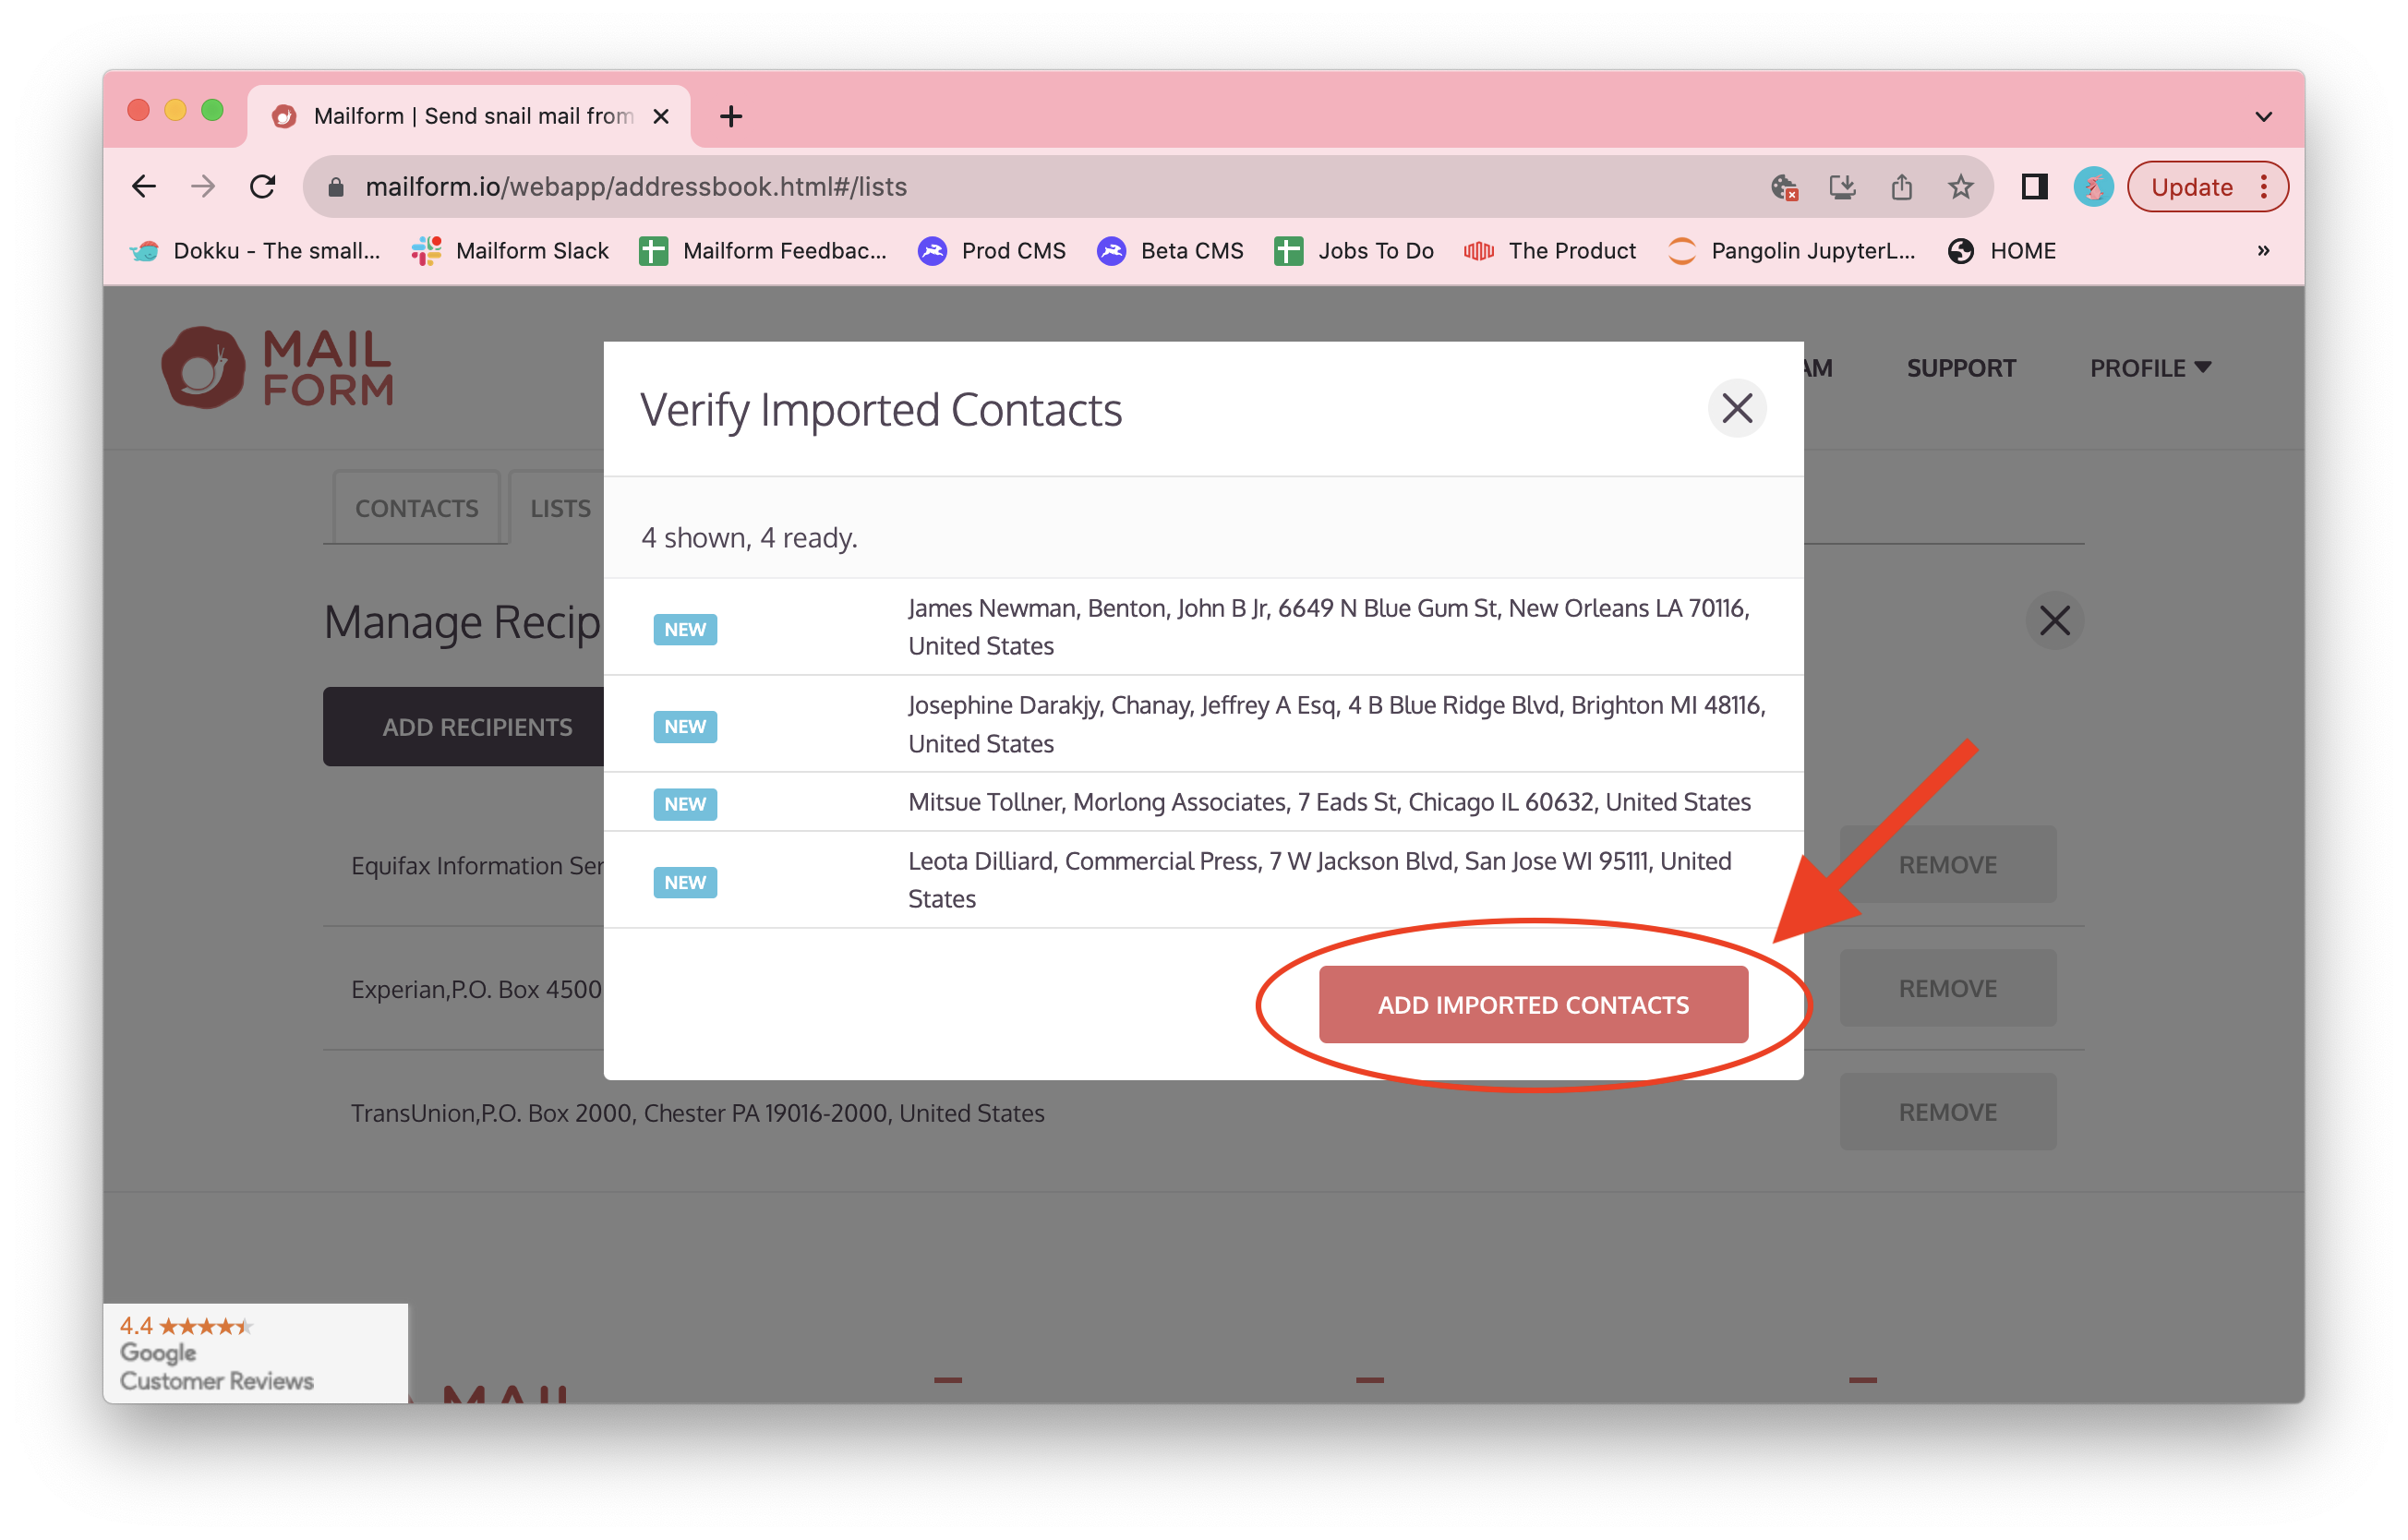
You'll be shown a verification window: this lists all contacts loaded from the file, with labels to let you know if they already exist in your address book, or if they are already part of the list. Once you've verified the contacts, click the Add Imported Contacts button to complete the import process.
The contacts will be imported and you'll see the count of recipients in the list has been updated.
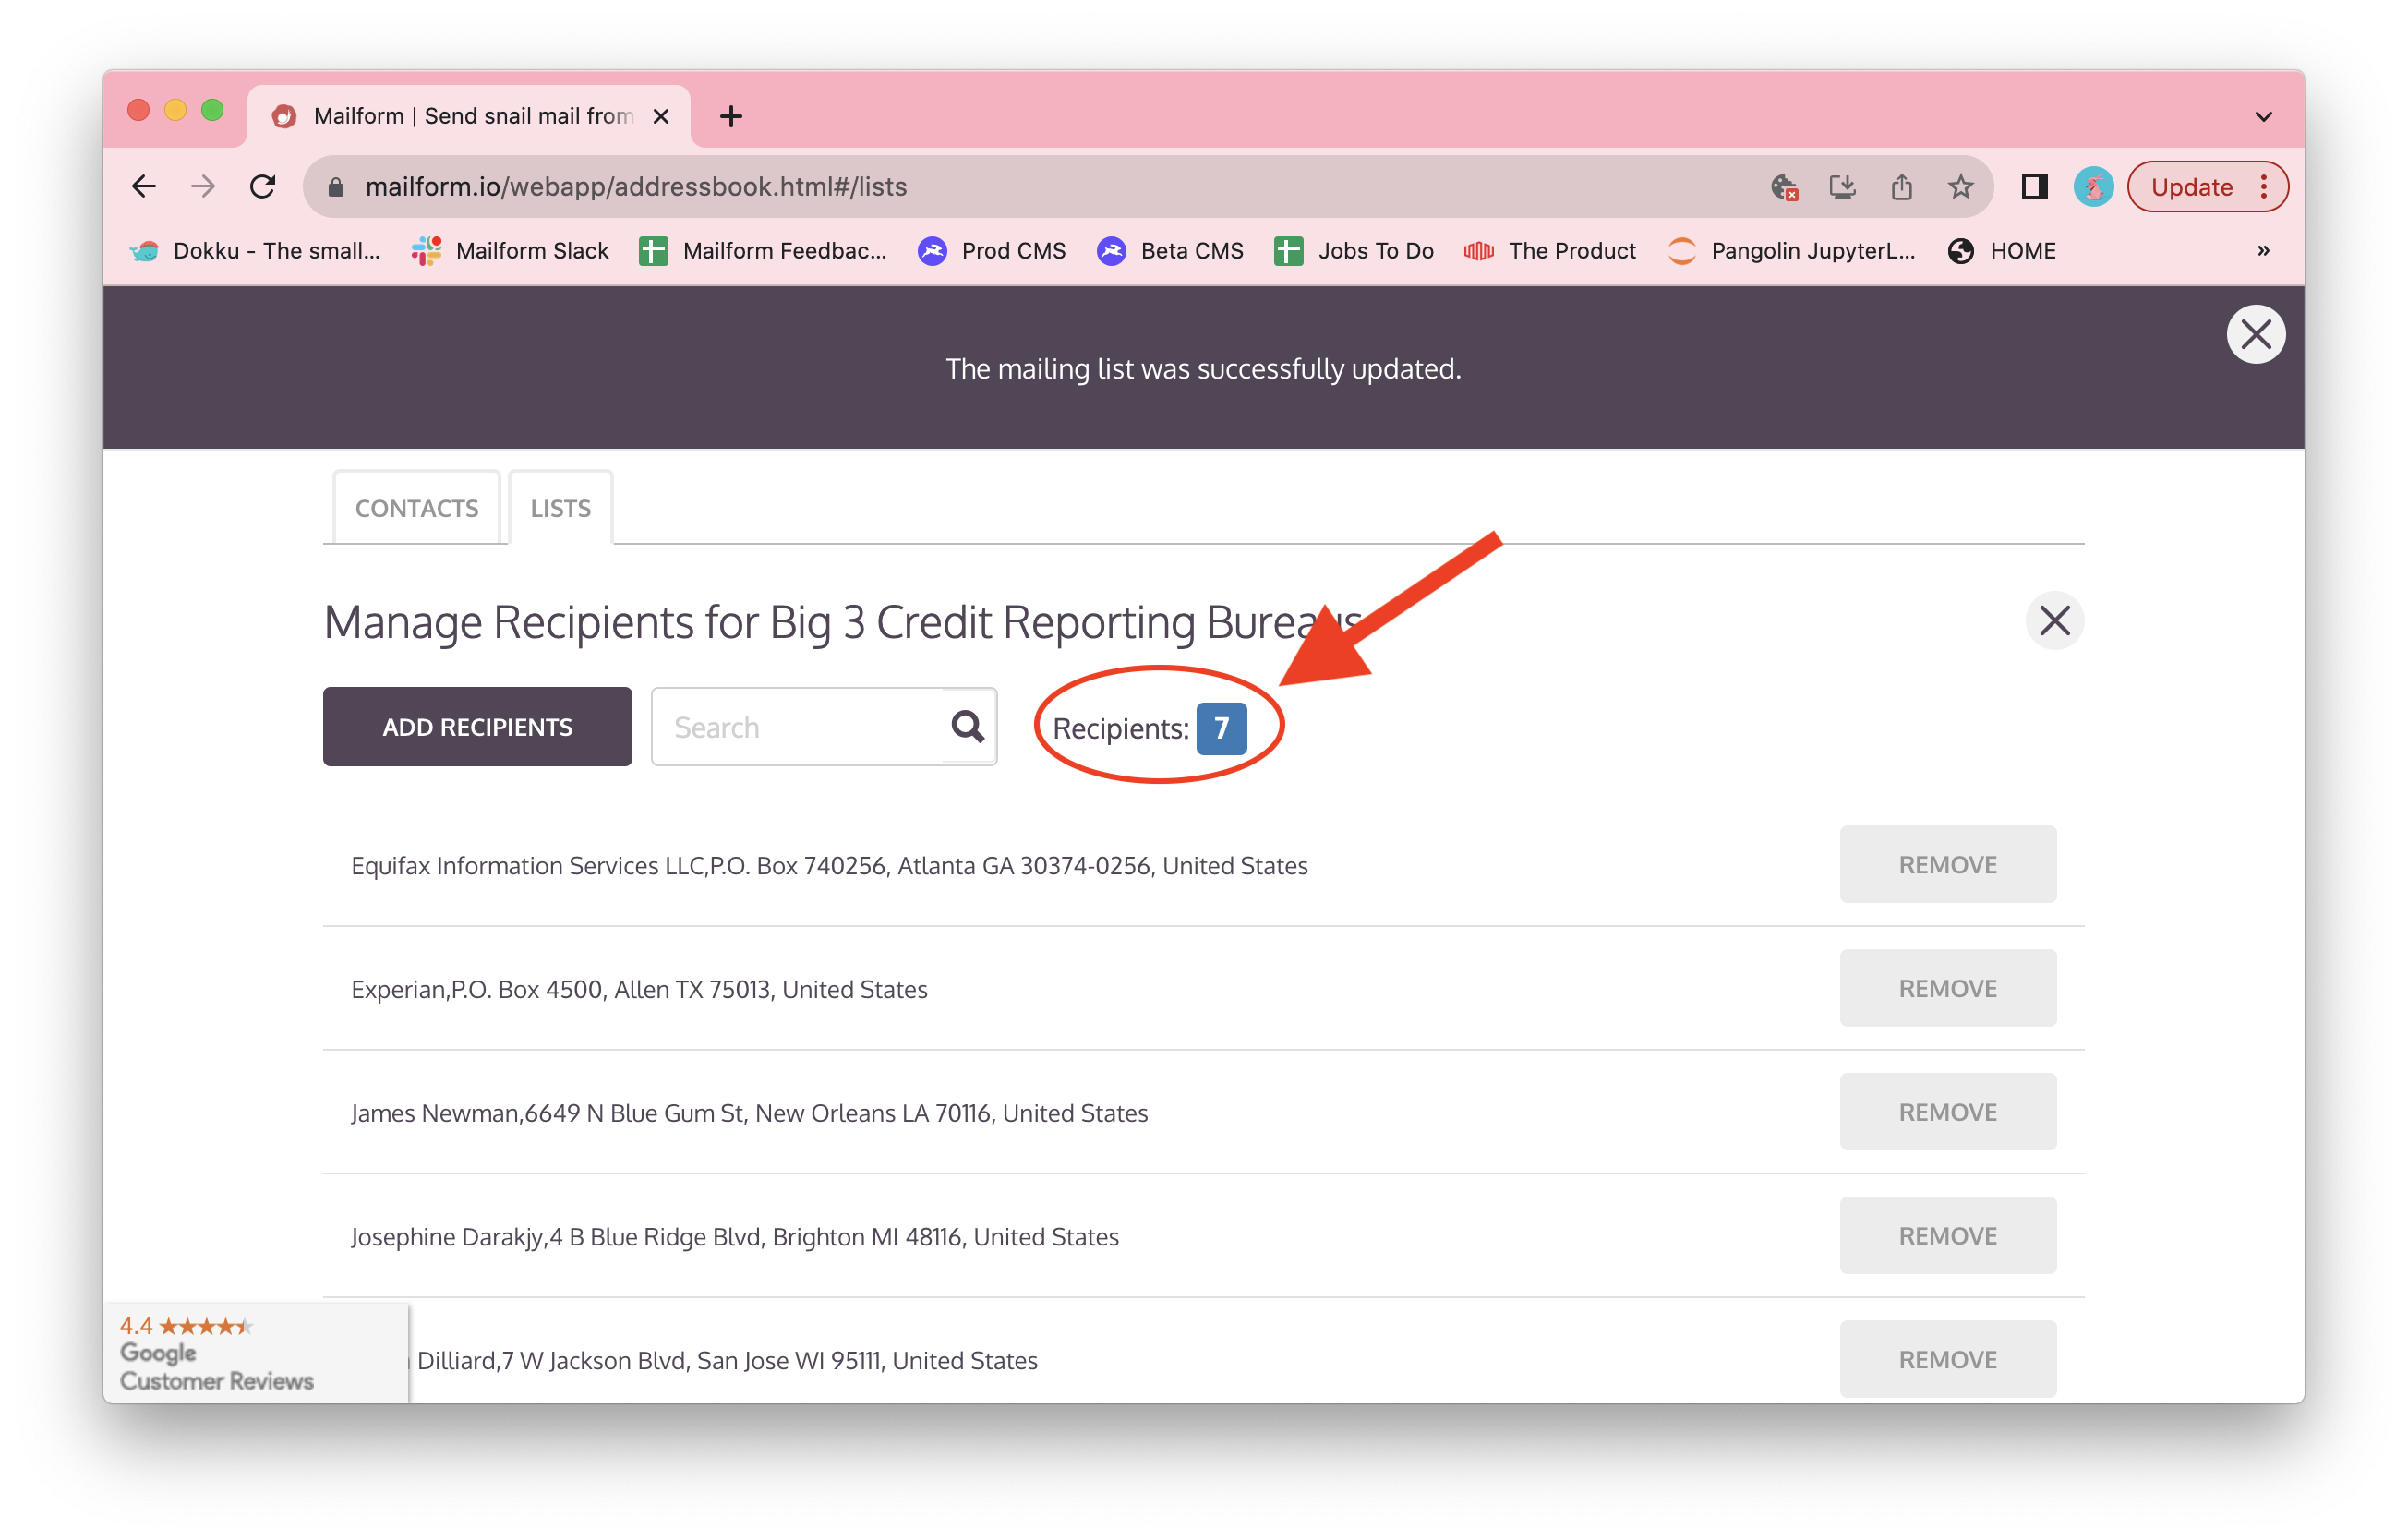
Once you've added recipients to the list, click the x in the mailing list title line to return to the main list management screen. You can now click the Send Mail button to send one or more letters to every recipient in the list.
Happy mailing, and thanks once again for using Mailform!